Middleburg sits in the northern part of Clay County where property sizes tend to run larger than typical suburban developments. The area's rural character, mix of newer subdivisions and older homes, and proximity to both Jacksonville and Green Cove Springs create diverse sod installation needs.
The climate puts Middleburg solidly in Zone 9a, occasionally dipping into 8b during cold winters. This affects grass selection differently than in Jacksonville proper. The slightly cooler winters mean some grass varieties show more cold tolerance issues here.
Middleburg Soil Characteristics
Sandy soil dominates Middleburg just like the rest of Clay County and Northeast Florida. The drainage is excellent—sometimes too excellent. Water and nutrients move through the soil quickly, which shapes every aspect of lawn care from installation through maintenance.
Some properties closer to Black Creek or in low-lying areas have heavier soil mixed with the sand. This improves water retention but isn't common. Most lots work with pure Florida sand that requires appropriate installation techniques and maintenance practices.
Newer subdivisions off County Road 220 and around Doctors Lake often have disturbed soil from development. Construction equipment compacts the ground, and builders sometimes spread minimal topsoil over fill material. This creates challenging establishment conditions for new sod.
Older properties on larger lots typically have better soil structure from years of organic matter accumulation and less construction disturbance. The challenge there is often patchy existing grass or bare areas that need renovation.
Choosing the Right Grass for Middleburg
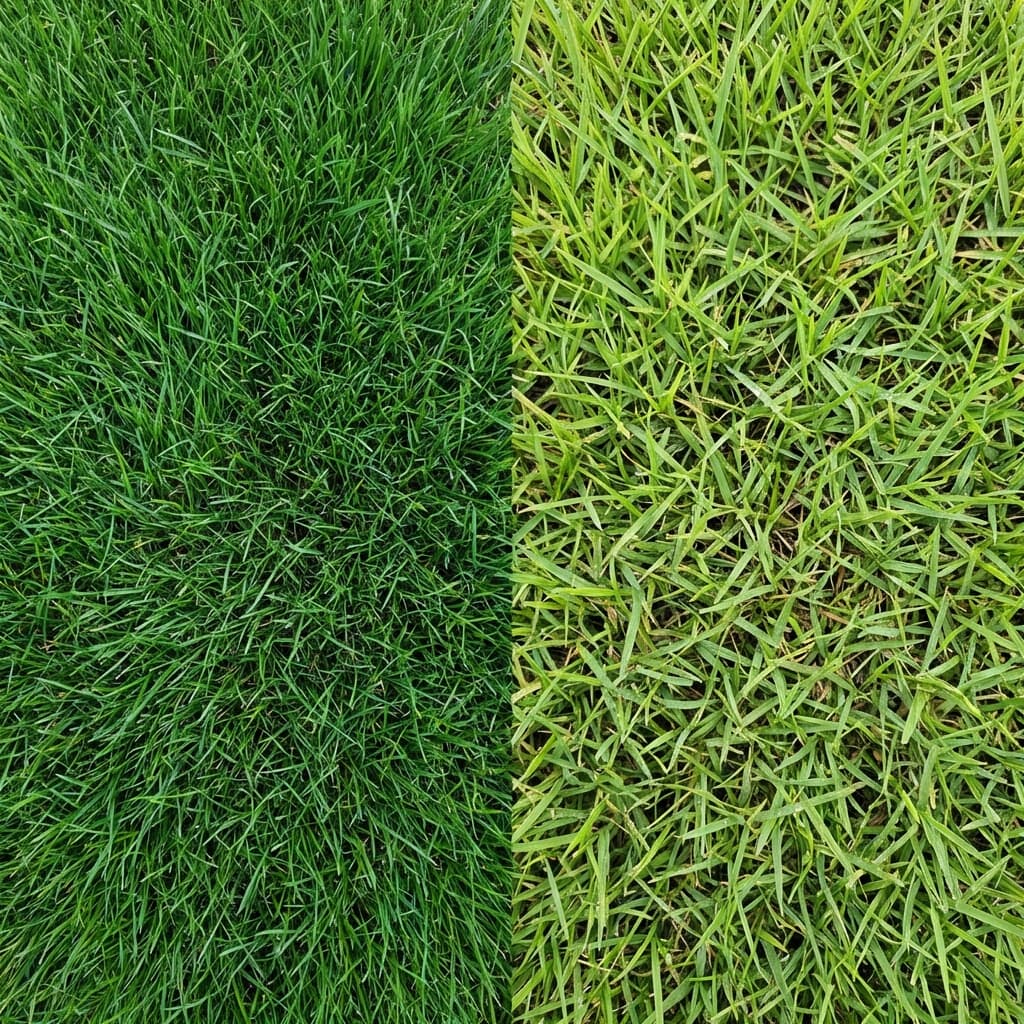
St. Augustine grass works well across Middleburg for properties that want dense, attractive turf. Floratam is the most common variety, but its cold sensitivity occasionally shows during harsh winters. Palmetto St. Augustine offers better cold tolerance and handles shade better, making it a smart choice for properties with significant tree cover.
Bahia grass fits many Middleburg properties perfectly. If you have a larger lot, want lower maintenance requirements, and don't mind a coarser texture, Bahia makes sense. It tolerates drought better than St. Augustine, needs less fertilizer, and handles our soil without much fuss. Many horse properties and rural homesteads use Bahia for most of the lawn area and reserve St. Augustine for high-visibility areas near the house.
Zoysia has gained traction in newer subdivisions. It needs less water once established, creates a dense lawn, and handles moderate shade. The slower growth rate means less mowing, which appeals to people managing larger properties.
Bermuda grass works if you want a full-sun lawn and don't mind winter dormancy. It's tough and spreads aggressively, but the brown winter color bothers most homeowners who want year-round green grass.
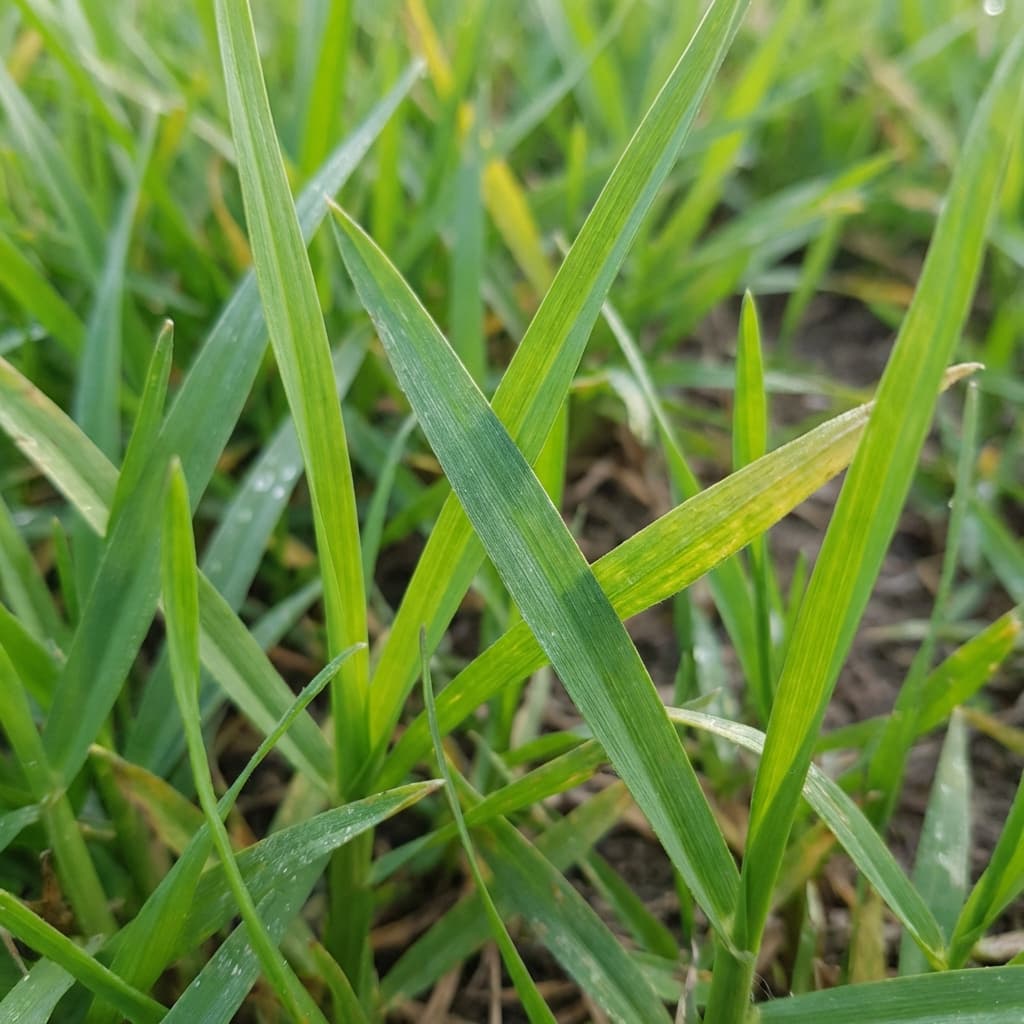
Centipede grass appears on some older Middleburg properties. It needs less fertilizer than St. Augustine but shows iron chlorosis (yellowing) more readily. It's fallen out of favor but still grows on properties where it was installed decades ago.
Best Timing for Sod Installation
The ideal window for sod installation in Middleburg runs from April through early June and again from September through mid-October. These periods offer warm soil temperatures for root growth without the extreme heat and humidity of summer or the cold risk of winter.
Spring installation from April through May gives grass the entire growing season to establish before winter. This is the preferred choice for most projects. Soil temperatures are rising, rainfall is usually adequate, and grass establishes quickly.
Fall installation from September through mid-October works well because temperatures moderate while soil stays warm. Grass roots grow aggressively during fall even as top growth slows. The challenge is getting sod down early enough to establish before cold weather arrives.
Summer installation (late June through August) is possible but challenging. The heat and humidity stress new sod, and establishment requires very consistent watering—sometimes twice daily. If you must install sod during summer, be prepared for intensive management.
Winter installation (November through March) is risky in Middleburg. Cold soil temperatures slow root development dramatically. A hard freeze within the first few weeks after installation can severely damage or kill new sod before it establishes. Avoid winter installation unless you have specific reasons and accept the risks.
Site Preparation Makes the Difference
Proper site preparation determines sod installation success more than any other factor. Skipping preparation steps to save time or money virtually guarantees problems.
Start by clearing the area completely. Remove old grass, weeds, rocks, and debris. The easiest method is using a sod cutter to remove existing turf, though you can also spray out grass with herbicide and wait 7-10 days before installation.
Test the soil if you're uncertain about conditions. Clay County Extension can help with testing. The results tell you about pH, nutrient levels, and any amendments that might help establishment.
Till or loosen the top 4-6 inches of soil. This is critical in new construction areas where soil is compacted from equipment traffic. Compacted soil prevents root penetration and water infiltration. Even light tilling helps tremendously.
Grade the area appropriately. Water should flow away from structures and not pond anywhere in the lawn. A minimum slope of 2% (about 2-3 inches drop per 10 feet) prevents standing water while not being steep enough to cause erosion.
Add soil amendments if needed. Sandy soil benefits from organic matter like compost or composted manure. Work a 1-2 inch layer into the top few inches of soil. This improves water retention and nutrient holding capacity.
Firm the soil lightly before sod installation. The ground should be firm enough to walk on without sinking but not hard-packed. Roll with a light roller or compact by walking over the area.
Installation Process
Sod should be installed as soon as possible after harvest—ideally within 24 hours, certainly within 48 hours. The longer sod sits on pallets, the more stress it experiences.
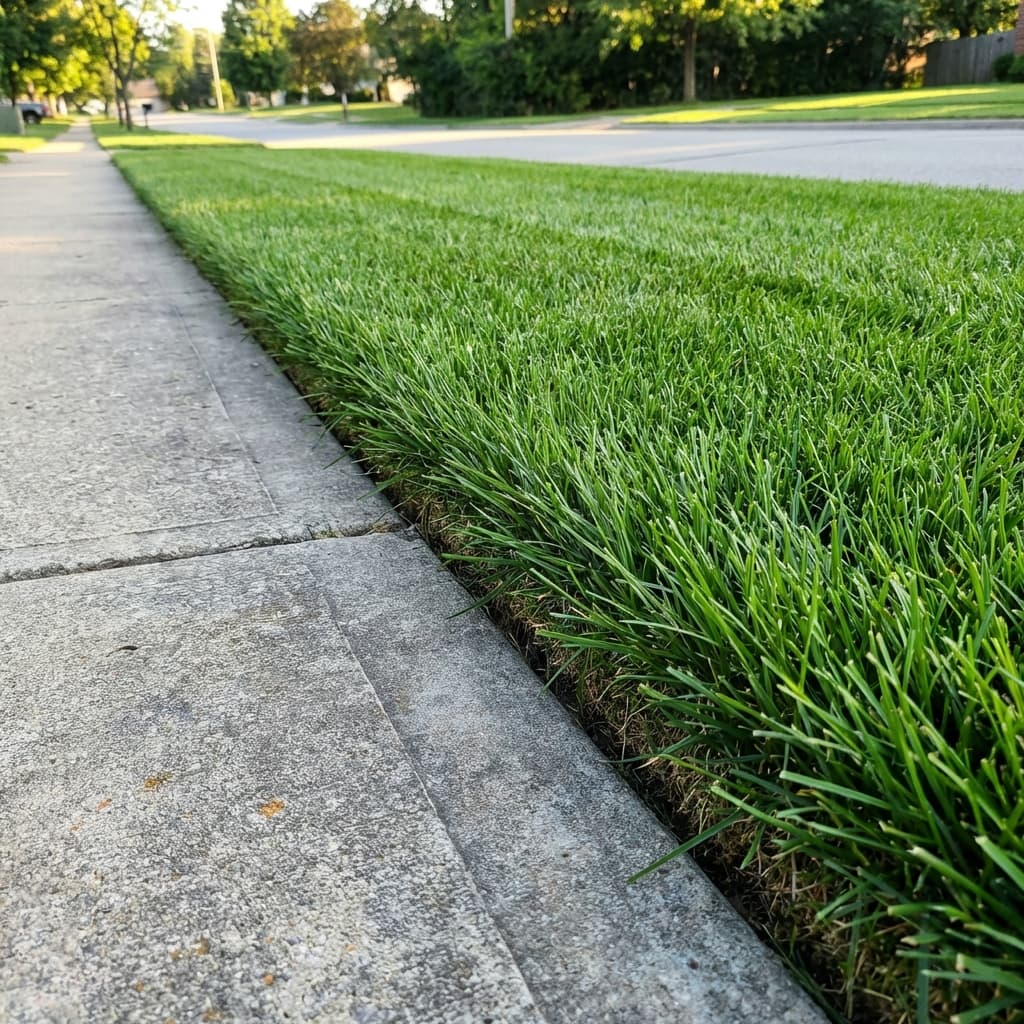
Start installation along the longest straight edge, usually along a driveway or sidewalk. This creates a clean baseline for the rest of the installation.
Lay sod in a brick or staggered pattern. Don't line up the ends—offset each row by half a sod length. This prevents continuous seams that don't knit together well.
Fit pieces tightly together without overlapping. Gaps create dry spots and overlaps create thickness variations. Use a sharp knife to cut sod for fitting around curves, sprinkler heads, or obstacles.
Avoid walking on newly laid sod as much as possible. If you must walk on it, use planks to distribute your weight and prevent leaving footprints in the soft ground.
Roll the entire area with a water-filled roller after installation. This ensures good sod-to-soil contact, removes air pockets, and firms everything in place.
Critical First Two Weeks: Establishment Watering
The first 10-14 days determine whether your new lawn succeeds or fails. Sod needs consistent moisture during this period to develop roots into the soil below.
Water immediately after installation—within 30 minutes if possible. The sod should be thoroughly wet, and moisture should penetrate into the soil underneath.
For the first week, water daily. During hot weather, you might need to water twice daily—early morning and early afternoon. The goal is keeping the sod and top inch of soil consistently moist but not waterlogged.
Check moisture by lifting a corner of the sod. The underside should be damp, and the soil underneath should be wet. If either is dry, water more.
After the first week, gradually reduce watering frequency while increasing the amount per session. By day 10-14, you should be watering every other day but applying enough water to penetrate 4-6 inches deep.
Test establishment by gently tugging on sod edges. If roots have engaged the soil and resist pulling, establishment is progressing. This typically takes 10-14 days in good conditions, longer in cooler weather.
The watering restriction rules allow supplemental irrigation for new sod establishment. Take advantage of this—you can't make up for inadequate watering during the establishment period.
First Mowing and Initial Fertilization
Wait until grass roots establish before the first mowing. Tug gently on a corner—if it resists pulling up and roots are visible on the underside, you can mow.
Set the mower high for the first cutting. Remove no more than one-third of the blade height. For St. Augustine, this means mowing when grass reaches about 5-6 inches and cutting to 3.5-4 inches.
Keep mower blades sharp. Dull blades tear new grass rather than cutting cleanly, which stresses it unnecessarily.
Don't fertilize immediately after installation. The sod was fertilized before harvest and contains adequate nutrients for initial establishment. Wait 4-6 weeks before the first fertilizer application.
When you do fertilize, use a complete fertilizer with slow-release nitrogen. Apply at half the normal rate for the first application. Full-rate fertilization can burn young grass that isn't fully established.
Long-term Success: Transition to Maintenance
After the first 4-6 weeks, transition from establishment care to regular maintenance. This means adjusting watering to a twice-weekly schedule (per restriction rules) with deeper soaking sessions.
Gradually lower the mowing height to the target range for your grass type. St. Augustine should settle at 3.5-4 inches. Bahia can go 3-4 inches. Zoysia sits at 2-3 inches depending on variety.
Develop a fertilization schedule appropriate for your grass type. St. Augustine needs 4-5 pounds of nitrogen per 1,000 square feet annually. Bahia needs less—2-3 pounds. Zoysia falls in between at 3-4 pounds.
Watch for pest and disease problems during the first growing season. New grass is more susceptible to issues than established turf. Catch problems early before they spread.
Common Middleburg Installation Challenges
Large property sizes mean sod installation covers significant area. The more area you're installing, the more critical timing becomes. You can't leave pallets sitting for days while slowly working through installation. Plan for adequate help or professional installation for larger projects.
Well water is common in Middleburg. This works fine for irrigation but sometimes contains high iron levels that stain sidewalks and driveways. The grass doesn't mind, but the aesthetics bother some homeowners.
Wildlife pressure increases on rural properties. Deer, wild hogs, and other animals might damage new sod. This isn't common but happens occasionally on properties backing to undeveloped land.
Irrigation system design matters more on larger lots. Adequate coverage requires more zones, proper head spacing, and sufficient water pressure. Many rural properties rely on well water systems that have pressure or flow limitations.
Working With Middleburg's Climate
The slightly cooler winters in Middleburg compared to Jacksonville proper mean grass takes a bit longer to green up in spring and might brown slightly more in winter. This is normal and doesn't indicate problems.
Summer heat affects Middleburg the same as anywhere in Northeast Florida. New sod needs protection from heat stress through adequate watering and avoiding installation during the hottest weeks.
Afternoon thunderstorms from June through September are common. These help with watering but also increase disease pressure. Avoid evening irrigation to reduce fungal disease risk.
When to Hire Professional Installation
Sod installation is physically demanding work that requires some skill for best results. Small areas (under 1,000 square feet) are manageable for most homeowners willing to do the work.
Larger areas benefit from professional installation. Professionals have the equipment, experience, and manpower to handle site preparation and installation efficiently. They also know how to grade properly, which is critical for drainage and long-term success.
Professional installation typically includes site preparation, material delivery, installation, and initial watering. This provides better results than DIY installation in most cases, especially for properties over 2,000-3,000 square feet.
Making Your Investment Last
Sod installation represents a significant investment in your property. Proper establishment care during the first few weeks protects that investment.
The first year requires more intensive management than established lawns. Water appropriately, fertilize on schedule, mow at correct heights, and watch for problems. This initial effort creates a healthy, established lawn that requires less intensive care in subsequent years.
Most new lawns experience some settling, minor leveling issues, or small bare spots during the first year. Address these promptly with light topdressing, additional sod pieces, or plugging rather than letting problems expand.
Middleburg's combination of climate, soil, and typical property characteristics creates good conditions for successful sod installation. Understanding the local environment and following appropriate practices results in attractive, healthy lawns that last for years with normal maintenance.
Need Professional Sod Installation?
Jax Sod provides sod installation, sod replacement, and new lawn installation across Jacksonville and Northeast Florida. Free quotes!
Related Articles
10 Sod Installation Mistakes to Avoid in Jacksonville
Avoid costly sod installation mistakes in Jacksonville. Learn the top 10 errors homeowners make and how to install your lawn correctly the first time.
Amelia Island FL Sod Installation: Luxury Lawn Solutions
Professional sod installation services for Amelia Island properties. Expert tips for coastal lawns, salt-tolerant varieties, and luxury landscaping in Northeast Florida.
Bartram Park Jacksonville Sod Installation: Complete Guide for New Lawns
Everything you need to know about sod installation in Bartram Park. From soil prep to variety selection, learn how to establish a beautiful new lawn in Jacksonville's climate.
Get Started
Ready for a New Lawn?
Get a free, no-obligation quote from Jax Sod for sod installation, sod replacement, or a new lawn in the Jacksonville area.
(904) 901-1457