Step-by-Step Sod Installation Guide for Jacksonville
Installing new sod transforms your Jacksonville property from bare dirt or patchy grass into a lush, green lawn in a single day. But successful sod installation isn't just about rolling out strips of grass and hoping for the best. Proper preparation, correct laying technique, and diligent aftercare make the difference between sod that thrives for decades and sod that struggles, browns, or fails within weeks.
After years installing sod across Northeast Florida, we've developed proven techniques that work specifically with Jacksonville's sandy soil, hot humid climate, and unique growing conditions. Whether you're tackling a DIY project in your Riverside backyard or planning a full lawn replacement at your Nocatee home, this guide walks you through every step of professional-quality sod installation.
In this comprehensive guide, you'll learn exactly how to prepare your Jacksonville soil, when to schedule delivery, how to lay sod correctly, and how to care for your new lawn during those critical first 30 days. We'll also help you recognize when a project is better suited for professional installation.
Step 1: Test and Prepare Your Soil
Before your sod even arrives, soil preparation is the most important step in the entire installation process. Jacksonville's sandy soil presents unique challenges that proper prep work addresses.
Conducting a Soil Test
Start with a soil test through the UF/IFAS Extension office in Duval County. A basic soil test costs around $10-15 and provides essential information about pH, nutrient levels, and organic matter content. Jacksonville soil typically runs slightly acidic (pH 5.5-6.5) and low in organic matter due to its sandy composition.
Collect soil samples from multiple spots around your installation area, mixing them together in a clean bucket. Take samples from 4-6 inches deep, since that's where your sod roots will establish. Mail or drop off the sample at the UF/IFAS Extension office at 1010 N McDuff Avenue in Jacksonville, and you'll receive results within 1-2 weeks.
The test results will tell you what amendments to add before installation. Most Jacksonville lawns benefit from lime to raise pH toward the 6.0-6.5 range ideal for St. Augustine and other warm-season grasses.
Removing Old Grass and Vegetation
If you're replacing existing grass, complete removal is essential. Half-measures lead to problems. You have several options depending on your property size and timeline.
Herbicide method: Apply a non-selective herbicide like glyphosate to kill existing grass 2-3 weeks before installation. This is the cleanest method for large areas and works well in Jacksonville's warm climate where grass dies back quickly. Wait until the grass is completely brown and dead before proceeding.
Sod cutter method: Rent a sod cutter from equipment rental stores in Jacksonville (available at most home improvement stores). This machine slices beneath existing grass, allowing you to roll it up and remove it. This is the fastest method and preferred if you're working on a tight timeline. Sod cutters work particularly well on Jacksonville's sandy soil, which cuts easily.
Manual removal: For small areas under 500 square feet, you can remove grass manually with a flat shovel or spade. This is labor-intensive but requires no chemicals or rental equipment. It's practical for side yards or small front yard sections in neighborhoods like San Marco or Springfield where lots are smaller.
Remove all debris, roots, and old grass. Don't bury it or till it in, as decomposing organic matter creates soft spots and uneven settling.
Step 2: Grade and Level Your Installation Area
Proper grading ensures water drains away from your house and eliminates low spots where water pools. This step is crucial in Jacksonville, where we receive 52 inches of rain annually, much of it during summer thunderstorms.
Establishing the Correct Grade
Your lawn should slope gently away from your foundation at a rate of about 1-2 inches per 10 feet. For a typical Jacksonville home, this means the soil at your foundation should be 4-6 inches higher than the soil 20-30 feet away at the edge of your yard.
Use a laser level (rentable) or a long straight board with a level on top to check grade. Mark high and low spots with spray paint. Add fill dirt to low areas and remove soil from high spots. For properties in Mandarin or St. Johns County with natural slopes, work with the existing grade rather than fighting it, but ensure water still moves away from structures.
Jacksonville's sandy soil is ideal for grading work because it's easy to move and shape. However, it also settles more than clay soils, so compact as you go using a plate compactor (rentable) or by watering thoroughly and letting the area settle for several days.
Creating a Smooth, Level Surface
Once grading is correct, rake the entire area smooth. Your goal is a surface free of clumps, rocks, and depressions. The ground should be firm enough that you don't sink when walking on it, but loose enough that the top 1-2 inches is workable soil.
Use a landscape rake to work the surface until it's as smooth as a baseball infield. This attention to detail pays off when you lay sod, as every bump or depression translates to an uneven finished lawn. At Jax Sod, we spend significant time on this step because it's nearly impossible to fix once sod is installed.
Step 3: Add Soil Amendments for Jacksonville Conditions
Jacksonville's sandy soil drains quickly, which is good for preventing root diseases but bad for water and nutrient retention. Amendments improve soil structure and give your sod the best possible start.
Essential Amendments for Sandy Soil
Organic matter: Spread 1-2 inches of quality compost, composted manure, or peat moss over your installation area. This adds organic matter that helps sandy soil retain moisture and nutrients. Work it into the top 2-3 inches with a rake. For a typical 2,000-square-foot Jacksonville yard, you'll need roughly 5-10 cubic yards of organic material.
Starter fertilizer: Apply a starter fertilizer with higher phosphorus content (the middle number on fertilizer bags) to encourage root development. A formula like 5-10-5 or 10-20-10 works well. Follow bag instructions for application rates, typically 1-2 pounds per 100 square feet. Water lightly after application to move nutrients into the soil.
Lime (if needed): Based on your soil test results, apply lime to raise pH if needed. Jacksonville's acidic sand often requires 25-50 pounds of lime per 1,000 square feet. Apply lime several weeks before installation if possible, as it takes time to affect pH.
Jacksonville Pro Tip: For properties in the Beaches communities (Jacksonville Beach, Atlantic Beach, Neptune Beach), soil can be even sandier with higher salt content due to proximity to the ocean. Extra organic matter and possibly sulfur to manage pH are often beneficial.
Mixing and Incorporating Amendments
Don't just spread amendments on top. Mix them thoroughly into the top 3-4 inches of soil. This creates a transition zone between your existing sandy soil and the soil that came with your sod, promoting faster root penetration.
After incorporating amendments, rake smooth again and water lightly to settle everything. Let the area rest for 24-48 hours before sod delivery. This gives amendments time to integrate with the soil and allows you to identify any settling or low spots that need adjustment.
Step 4: Check Your Irrigation System
New sod requires frequent watering for the first 2-3 weeks. Before sod arrives, verify your irrigation system works correctly.
Testing Sprinkler Coverage
Turn on each zone of your irrigation system and walk the area checking for proper coverage. Look for dry spots, misaimed sprinkler heads, and areas with too much or too little water. Adjust sprinkler heads so coverage overlaps slightly, ensuring no gaps.
For Jacksonville properties on city water through JEA, verify your rain sensor is functioning. Florida law requires rain sensors to prevent watering during rainfall, and SJRWMD regulations are strict about wasteful irrigation.
If you don't have an irrigation system, plan your watering strategy before sod arrives. For smaller areas, you might use oscillating sprinklers on timers. For larger areas over 2,000 square feet, consider having a basic irrigation system installed before sod. The investment pays off in water savings and consistent lawn health, especially during Jacksonville's hot summers.
Setting Temporary Watering Schedules
During the first 2 weeks after installation, you'll need to water 2-4 times daily, which exceeds normal SJRWMD watering restrictions. Contact SJRWMD to register for the new sod exemption, which allows you to water as needed for the first 30 days after installation, regardless of standard restrictions.
This exemption is critical. Without it, you're limited to watering on your designated days (odd addresses on Wednesday/Saturday, even addresses on Thursday/Sunday) and not between 10 AM and 4 PM. New sod can't survive on this restricted schedule during Jacksonville's summer heat.
Step 5: Schedule Sod Delivery Timing
Timing is everything with sod installation. Sod is a living plant that begins deteriorating the moment it's cut from the farm.
Best Time of Year to Install in Jacksonville
Ideal months: March through May and September through November are optimal for sod installation in Jacksonville. Temperatures are moderate (70s-80s), humidity is lower than summer, and afternoon thunderstorms are less frequent. Sod establishes quickly during these periods without the stress of extreme heat or cold.
Acceptable months: June through August can work but requires aggressive watering and careful monitoring. Jacksonville's summer heat (regularly 90-95°F with high humidity) stresses new sod. You'll use more water and need to watch for heat damage. Early morning installation is essential during summer months.
Difficult months: December through February presents challenges in Northeast Florida. While St. Augustine and Bahia are evergreen here, growth slows significantly in winter. Bermuda and Zoysia go fully dormant and shouldn't be installed November-March. Root establishment is slow in winter, extending the vulnerable period where sod can fail.
Delivery Day Scheduling
Order sod for delivery the same day you'll install it. At Jax Sod, we cut fresh sod the morning of delivery, ensuring it arrives at peak health. Never install sod that's sat on pallets for more than 8-12 hours, especially in warm weather.
Schedule delivery for as early as possible, ideally before 8 AM. This gives you the coolest part of the day to work and reduces heat stress on the sod while it waits on pallets. Jacksonville summer mornings in the 70s are far more forgiving than afternoons in the mid-90s.
Clear your driveway or the delivery area the night before. Sod pallets are heavy (2,000-3,000 pounds each) and require forklift or pallet jack placement. Ensure delivery trucks can access your property, particularly in older neighborhoods like Riverside and Avondale where streets are narrow and tree canopies are low.
Step 6: The Laying Pattern and Technique
Once sod arrives, work quickly and methodically. Every hour sod sits exposed to sun and air, it loses moisture and vigor.
Starting Point and Layout Strategy
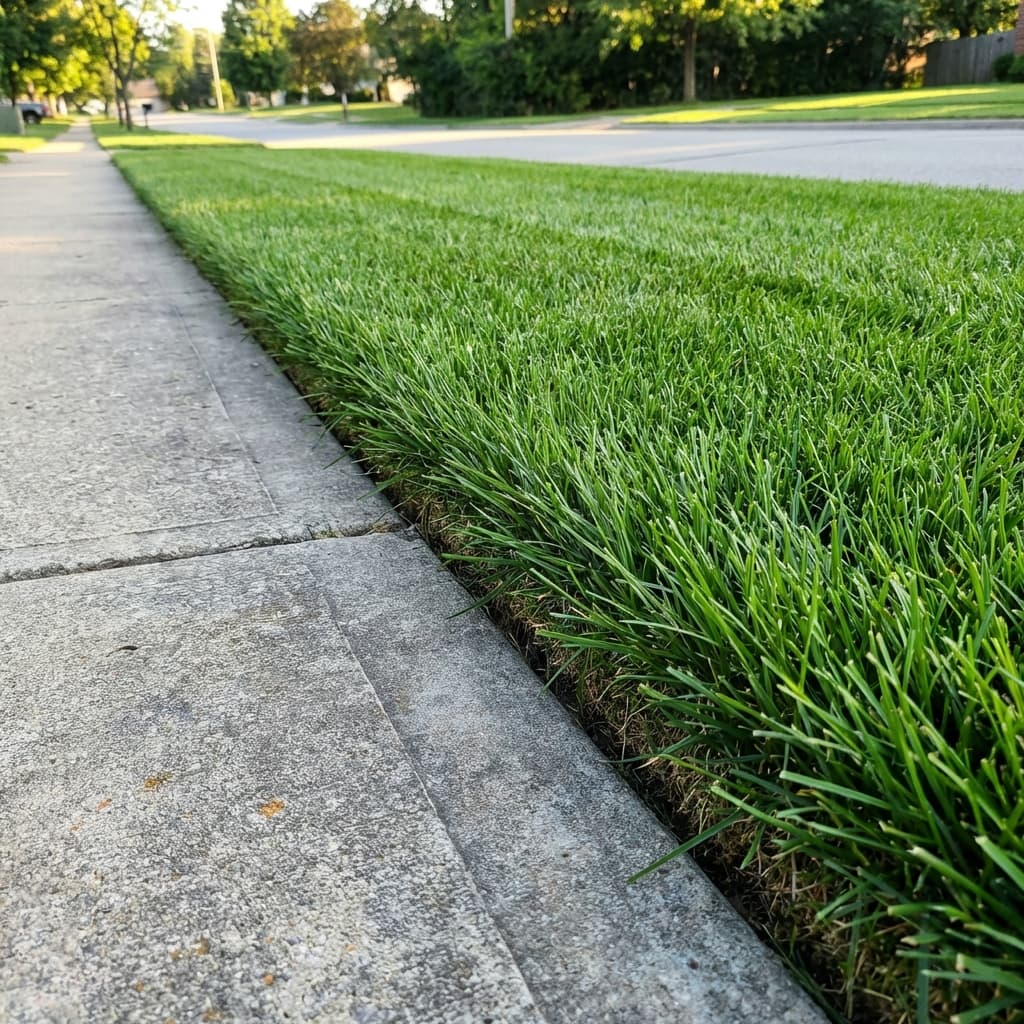
Begin laying sod along the longest straight edge of your property, typically against a driveway, sidewalk, or fence line. This gives you a straight reference line to work from. For most Jacksonville properties, starting along the front of the house or along the driveway makes sense.
Unroll the first piece of sod along your starting line, pushing it firmly against the edge. Avoid stretching the sod; lay it naturally. Stretched sod shrinks as it dries, creating gaps between pieces.
The Brick Pattern Method
Lay subsequent pieces in a brick pattern, staggering the seams like brickwork on a wall. Never line up seams in a continuous line, as this creates weak points where grass can die or weeds can invade.
Each piece should butt tightly against the previous piece with no gaps or overlaps. Push edges together firmly but don't overlap. Overlapped edges create raised seams that scalp when mowed and create an uneven lawn surface.
For the next row, cut your first piece in half so the seam doesn't line up with the row before. Continue this offset pattern throughout the entire installation area.
Working Efficiently in Jacksonville Heat
If you're installing during warm months (May-October in Jacksonville), work in sections. Lay 3-4 pallets worth of sod, then water that section immediately before continuing. Don't let laid sod sit unwatered for more than 30-60 minutes in temperatures above 80°F.
Have helpers shuttle sod pieces to you so you stay in position laying. Walking on newly laid sod isn't ideal but is acceptable if you step lightly and avoid pivoting, which can tear the fragile root-soil connection.
Keep unlaid pallets in shade if possible and mist them with water if you're moving slowly. However, the best strategy is simply to work quickly. Most DIY installers can lay 400-600 square feet per hour (roughly 1 pallet) with practice.
Step 7: Cutting Edges and Fitting Around Obstacles
Your property isn't all straight lines. You'll need to cut sod to fit edges, curves, and obstacles.
Tools for Cutting Sod
Keep a sharp knife or carpet knife handy for all cutting work. Some installers prefer a straight-edge shovel or edger, which also works well. Change knife blades frequently; dull blades tear sod rather than cutting cleanly.
For straight cuts (along sidewalks, driveways, bed edges), use a straight board as a guide and cut with one smooth motion. For curves, work slowly and cut to follow the existing edge.
Fitting Around Trees, Sprinklers, and Obstacles
Cut sod to fit around trees, leaving 2-3 inches of space around trunks. Sod laid directly against tree bark can cause moisture problems and damage to the tree. Later, this gap can be filled with mulch.
Around sprinkler heads, cut a small X in the sod where the sprinkler head emerges, then gently pull the sod down over the head. The sprinkler should sit just above the sod surface. If heads are too low or high, adjust them before the sod goes down, as it's difficult to access them later.
For obstacles like landscape lighting, mailbox posts, or utility boxes, cut sod carefully to fit snugly around them. Small gaps here aren't critical; grass will fill in over time.
Step 8: Rolling Your New Sod
After laying all sod, rent or borrow a lawn roller and roll the entire installation. This is a critical step that many DIY installers skip.
Rolling accomplishes two things: it presses sod firmly into contact with the soil beneath, eliminating air pockets that dry out roots, and it creates a smooth, even surface for future mowing.
Fill the roller half-full with water (don't overfill; an overly heavy roller damages sod). Roll in perpendicular directions, overlapping slightly on each pass. Roll the entire area until you've made firm contact everywhere.
After rolling, walk the lawn and look for lifted edges or sections that didn't make good contact. Press these areas down by hand or make an additional pass with the roller.
Step 9: Initial Watering
Immediately after installation and rolling, water thoroughly. This first watering is critical and different from ongoing watering schedules.
Apply enough water to soak through the sod and into the soil beneath, roughly 1 inch of water total. You want the soil 4-6 inches deep to be thoroughly wet. This encourages roots to grow downward into your prepared soil rather than staying in the shallow sod layer.
Check water penetration by lifting a corner of sod in several spots after watering. If the soil beneath is dry, water longer. Jacksonville's sandy soil drains quickly, so you'll need to apply water steadily to achieve penetration.
Don't create runoff or puddles. If water begins running off before penetration is achieved, water in cycles: apply water until runoff starts, wait 15-20 minutes for it to soak in, then water again. Repeat until you've achieved proper penetration.
Step 10: First 30 Days Care Overview
The first month after installation determines your sod's long-term success. Jacksonville's warm climate allows rapid establishment, but only with proper care.
Week 1-2: Frequent Light Watering
For the first two weeks, keep sod constantly moist. This typically means watering 2-4 times per day for 10-15 minutes per session. Early morning, midday, mid-afternoon, and sometimes early evening watering sessions are normal.
The goal isn't deep watering yet; it's keeping the sod and the top 2 inches of soil from drying out. Check moisture by lifting sod edges in several spots daily. If the underside is dry or the sod is pulling away from the soil, increase watering frequency.
Week 3-4: Transition to Deep, Infrequent Watering
After two weeks, roots should be beginning to penetrate into the soil beneath. Start reducing watering frequency but increasing duration. Transition to once daily watering, applying more water per session (20-30 minutes) to encourage deeper root growth.
By week 3, you should be able to tug on sod and feel resistance as roots anchor. Once you feel significant resistance, you can begin transitioning to a standard maintenance schedule of watering 2-3 times per week deeply.
First Mowing
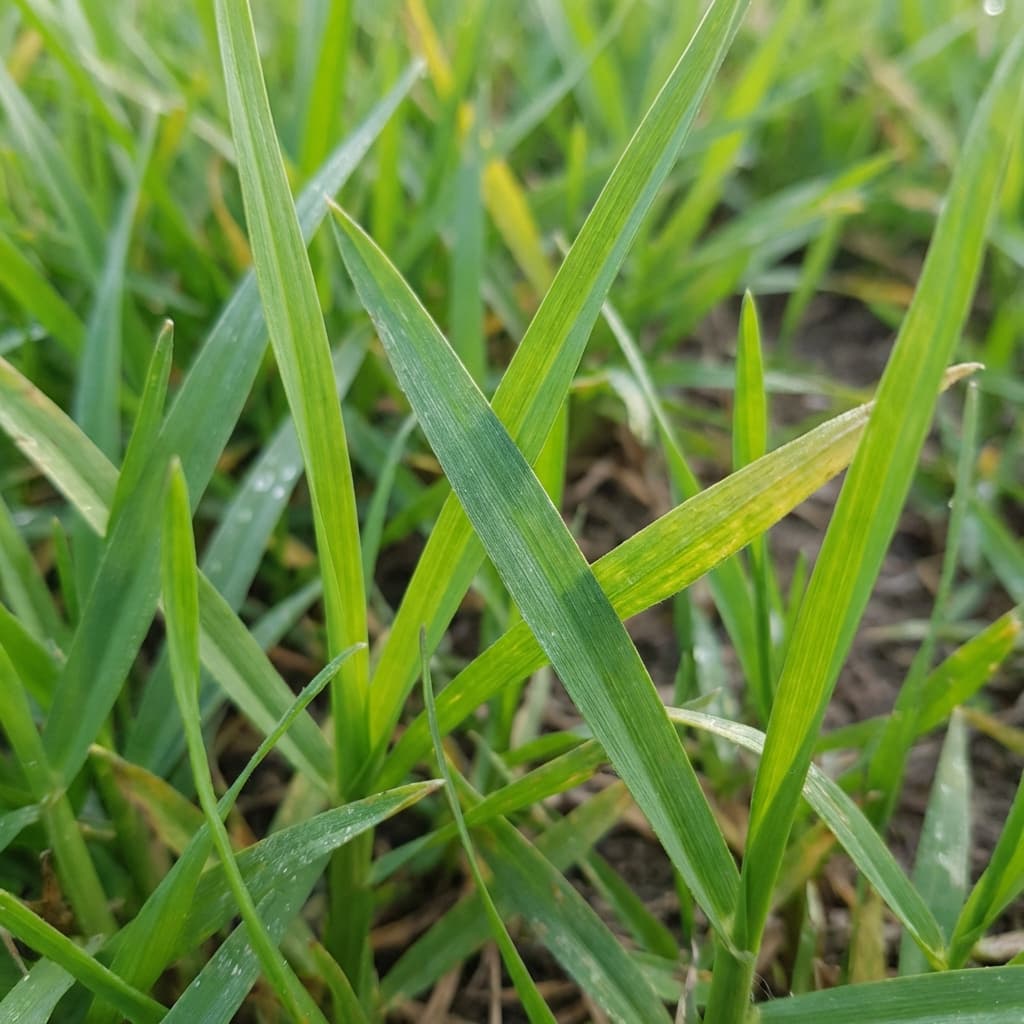
Don't mow until roots are established enough that you can't easily lift sod edges. This typically occurs 2-3 weeks after installation for St. Augustine and Zoysia, slightly longer for Bahia. Bermuda may be ready in 10-14 days during warm weather.
For your first mowing, remove only the top third of the grass blade. Keep mower blades sharp to avoid tearing young grass. After mowing, check several areas to ensure you didn't lift or damage the sod. If sod pulls up during mowing, wait another week before mowing again.
Fertilization
Wait 4-6 weeks after installation before applying your first maintenance fertilizer. The starter fertilizer you applied pre-installation provides nutrients during establishment. Early fertilization can burn tender new roots or promote top growth before roots are established, creating weak turf.
Tools and Equipment Needed for DIY Installation
Proper tools make installation faster and more professional. Here's what you'll need for a typical Jacksonville sod project:
Essential tools:
- Flat shovel or spade for soil work
- Landscape rake for smoothing and grading
- Sharp utility knife or carpet knife for cutting sod
- Measuring tape (100-foot recommended)
- Garden hose or sprinkler for watering
- Wheelbarrow for moving soil and amendments
- Work gloves
Recommended rental equipment:
- Sod cutter (if removing old grass)
- Plate compactor (for large areas or significant grading)
- Lawn roller (essential for good sod-to-soil contact)
- Laser level (for checking grade on large properties)
Optional but helpful:
- Leaf blower for cleaning off sod after installation
- Knee pads for comfort during laying
- Sun protection: hat, sunscreen, water (Jacksonville heat is real)
For projects over 3,000 square feet or 8 pallets, consider renting a small skid-steer loader with forks to move pallets around your property. This saves enormous physical effort and back strain.
When to Call a Professional Instead
DIY sod installation is achievable for many Jacksonville homeowners, but some projects are better handled by professionals. Consider calling Jax Sod for professional installation if:
Your project is large: Anything over 5,000 square feet (10-12 pallets) becomes extremely physically demanding. Professional crews can install in hours what takes DIYers days, and the sod spends less time sitting on pallets deteriorating.
Significant soil work is needed: If you need major grading, drainage correction, or soil amendment, professional equipment and expertise save time and ensure proper results. Jacksonville's sandy soil can be deceptive; what looks level often isn't, and proper drainage requires experience to assess.
Summer heat is extreme: Installing sod during July-August in Jacksonville requires speed and constant hydration management. Professional crews work during the coolest hours and have systems to keep sod moist throughout installation.
Your schedule is tight: If you need your lawn installed and ready quickly (for example, before a home sale or event), professionals ensure the job is done right the first time without delays.
You're unsure about any step: Sod installation is expensive (typically $2,500-6,000 for complete Jacksonville yards), and mistakes are costly to fix. Professional installation costs 40-50% more than DIY but includes expertise, proper equipment, and warranty protection.
At Jax Sod, our professional installation service includes complete soil preparation, precise grading, expert laying, rolling, and initial watering. We've installed millions of square feet across Northeast Florida for years, and we understand Jacksonville's specific conditions and challenges.
Common Installation Mistakes Jacksonville Homeowners Make
After decades serving Jacksonville, we've seen these mistakes repeatedly:
Installing in hot afternoon heat: Starting installation at noon in August is brutal for both you and the sod. Always begin early morning.
Skipping soil prep: Laying sod on unprepared, compacted, or poorly graded soil leads to poor establishment, drainage problems, and early failure. Prep work isn't optional.
Letting sod sit too long: Sod left on pallets for 12+ hours, especially in warm weather, develops heat stress and may never fully recover. Install the same day as delivery.
Not watering immediately: Some DIYers wait until they've laid all sod before watering anything. In Jacksonville heat, sod laid first thing in the morning can be stressed by afternoon if not watered promptly.
Creating gaps or overlaps: Gaps create dead patches and weed entry points. Overlaps create raised seams and scalping problems. Pieces should butt firmly together.
Poor edge cutting: Ragged, torn edges along sidewalks and beds look unprofessional and are more prone to drying and dying back. Take time to cut cleanly.
Insufficient rolling: Without good soil contact, sod can't establish roots. Don't skip rolling.
Conclusion
Installing sod in Jacksonville successfully comes down to thorough preparation, proper timing, correct laying technique, and diligent aftercare. While the process requires physical work and attention to detail, the reward is a beautiful, established lawn in a fraction of the time it takes to seed.
Remember the critical steps: test and prepare your sandy Jacksonville soil with organic amendments, grade for proper drainage, lay sod in a staggered brick pattern on the day of delivery, roll for firm soil contact, and maintain frequent watering for the first two weeks. Follow these guidelines, and your new sod will establish quickly in Jacksonville's warm climate.
For small projects under 2,000 square feet in simple layouts, DIY installation is very doable with proper preparation and a full day of work. For larger or more complex projects, professional installation by Jax Sod ensures expert results with less stress and guaranteed success.
Ready to install beautiful new sod at your Jacksonville property? Contact Jax Sod today at (904) 901-1457 or visit jaxsod.com for a free estimate. Whether you're planning DIY installation and need fresh sod delivered, or you prefer professional installation with complete soil prep and aftercare, our team has served Northeast Florida for years with expertise you can trust.
Need Professional Sod Installation?
Jax Sod provides sod installation, sod replacement, and new lawn installation across Jacksonville and Northeast Florida. Free quotes!
Related Articles
10 Sod Installation Mistakes to Avoid in Jacksonville
Avoid costly sod installation mistakes in Jacksonville. Learn the top 10 errors homeowners make and how to install your lawn correctly the first time.
Amelia Island FL Sod Installation: Luxury Lawn Solutions
Professional sod installation services for Amelia Island properties. Expert tips for coastal lawns, salt-tolerant varieties, and luxury landscaping in Northeast Florida.
Bartram Park Jacksonville Sod Installation: Complete Guide for New Lawns
Everything you need to know about sod installation in Bartram Park. From soil prep to variety selection, learn how to establish a beautiful new lawn in Jacksonville's climate.
Get Started
Ready for a New Lawn?
Get a free, no-obligation quote from Jax Sod for sod installation, sod replacement, or a new lawn in the Jacksonville area.
(904) 901-1457