New Construction Sod Installation in Jacksonville
Congratulations on your new construction home in Jacksonville! Whether you've built in the growing communities of Nocatee, the established neighborhoods of Fruit Cove, or one of the new developments in Fleming Island, St. Johns, or Middleburg, you're facing an important decision: when and how to install your lawn.
New construction sod installation is fundamentally different from replacing an existing lawn. The soil conditions, timing constraints, budget considerations, and even HOA requirements create unique challenges that Jacksonville homeowners need to understand before that first piece of sod goes down. Get it right, and you'll have a beautiful lawn that enhances your home's curb appeal and provides enjoyment for years. Get it wrong, and you'll struggle with a problematic lawn that requires expensive renovation within a year or two.
At Jax Sod, we work with new construction lawn problems across Northeast Florida. New-home lawn issues can show up on luxury custom homes in Ponte Vedra and production builds in Orange Park, so the prep details matter.
In this comprehensive guide, we'll cover the optimal timing for new construction sod installation, the problems with builder-grade sod, soil issues specific to new construction, proper preparation techniques, irrigation considerations, HOA requirements, and how to choose the right grass for your new Jacksonville home.
When to Install Sod on New Construction
Timing is one of the most critical—and most confusing—aspects of new construction sod installation. The ideal time depends on several factors that are sometimes in conflict with each other.
The Construction Timeline
From a construction standpoint, sod installation typically happens near the very end of the building process. Most builders install sod after all major construction is complete but before the final inspection and closing. This usually means sod goes in 1 to 3 weeks before you take ownership of the home.
The construction timeline makes sense from the builder's perspective—they don't want to install sod early and then have it damaged by contractor vehicles, material deliveries, or final grading adjustments. They also want the home to look finished for your final walk-through and closing.
However, this creates challenges for optimal sod establishment, particularly in Jacksonville's climate. If your closing happens in June, July, or August, the sod will be installed during the most stressful time of year for grass—extreme heat, daily thunderstorms, and high humidity. The sod may look acceptable at closing but struggle in the weeks afterward.
The Seasonal Consideration
The best seasons for sod installation in Jacksonville are spring (March through May) and fall (September through November). Temperatures are moderate, rainfall is generally adequate but not excessive, and grass establishes quickly with relatively low stress. Sod installed during these optimal periods roots within 2 to 3 weeks and develops a deep, drought-resistant root system before summer heat or winter dormancy arrives.
Summer installation (June through August) is more challenging. Jacksonville's combination of intense sun, heat, humidity, and afternoon thunderstorms stresses new sod. Daily watering is critical, fungal disease pressure is high, and establishment takes longer. Sod can absolutely succeed in summer with proper care, but it requires more attention and management.
Winter installation (December through February) is generally low-risk for warm-season grasses like St. Augustine, Bermuda, and zoysia, but establishment is slow. Grass grows minimally in cool weather, so sod installed in January might not fully root until March or April. During this period, it's vulnerable to weed invasion and damage from foot traffic or pets.
The reality for new construction homeowners is that you often can't control timing perfectly. Your build schedule determines when the house is ready, and you can't simply delay closing by three months to wait for better sod weather. This is why proper preparation and grass variety selection are even more important for new construction—you need to compensate for less-than-ideal timing with better practices.
Before Closing vs. After Closing
Many Jacksonville homeowners wonder whether they should accept the builder's standard sod package or wait until after closing to install their own choice of grass. This decision has significant financial and practical implications.
If you accept builder-installed sod as part of your construction package, it will be in place at closing, and the cost is typically rolled into your mortgage. The lawn will be established (at least partially) when you move in, giving you immediate curb appeal. However, you have limited or no control over the grass variety, quality, or installation practices. Builder-grade sod is almost always the cheapest option available—usually Floratam St. Augustine in Jacksonville—installed with minimal soil preparation.
If you decline the builder's sod package, you'll likely receive a small credit (typically $1,000 to $3,000) and be responsible for installing your own lawn after closing. This gives you complete control over grass variety, quality, soil preparation, and installation timing. You can choose premium varieties like Palmetto St. Augustine, TifTuf Bermuda, or Empire zoysia. You can ensure proper soil preparation, irrigation system adjustment, and professional installation. The downside is you're writing a check for the lawn immediately after closing, when cash flow may be tight after down payment and moving expenses.
At Jax Sod, we typically recommend upgrading from builder-grade sod if your budget allows, even if it means waiting a few weeks after closing. The difference in long-term lawn quality is substantial, and the incremental cost difference is surprisingly small when you account for the credit from declining builder sod.
Builder-Grade Sod Problems
Builder-grade sod in Jacksonville new construction has earned a poor reputation for good reasons. Builders operate on tight budgets and margins, and landscaping is one area where they commonly cut costs. Understanding the typical problems helps you make informed decisions about whether to upgrade.
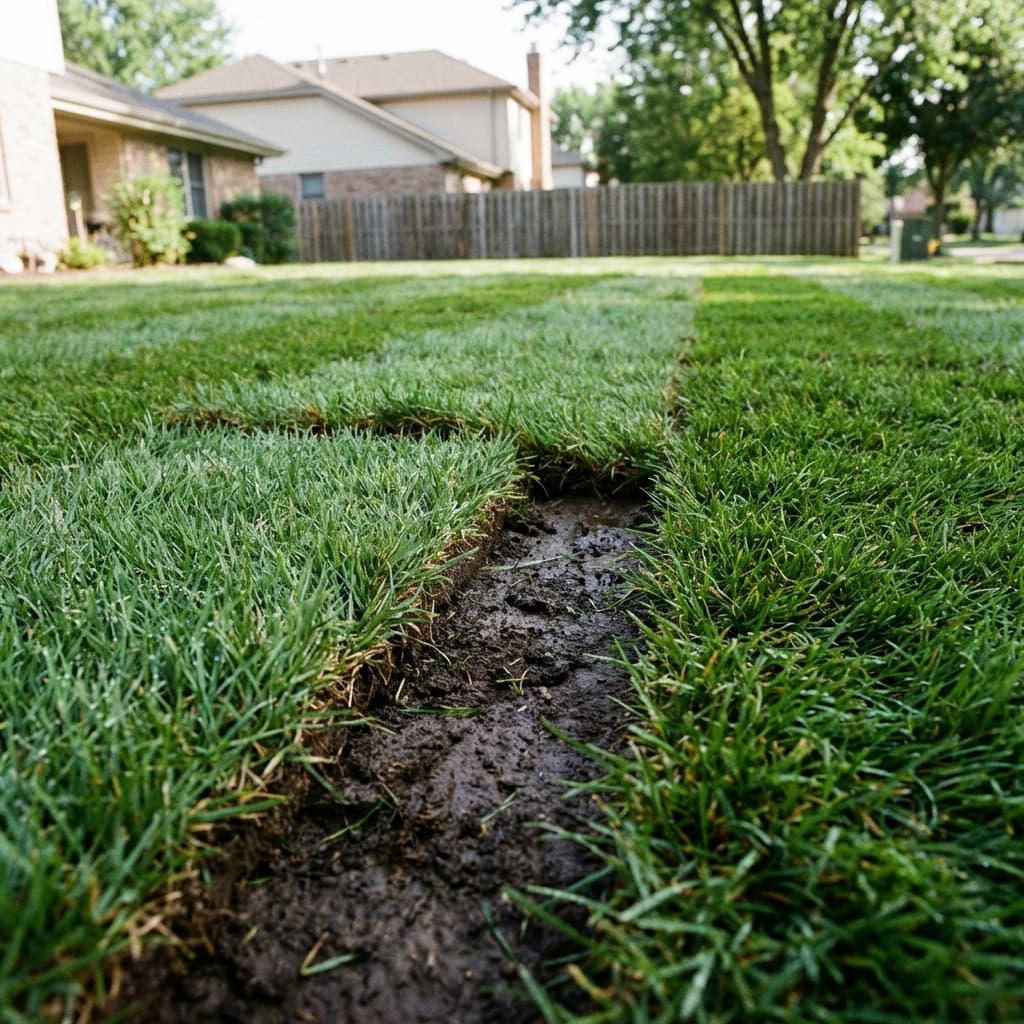
Thin Sod with Shallow Root Zones
Most builder-grade sod is cut very thin to reduce weight and cutting costs at the farm. While premium sod includes 1 to 1.5 inches of root zone soil, builder-grade sod often has only 0.5 to 0.75 inches. This thin cutting means fewer roots are included, and the sod has less stored moisture and nutrients to sustain it during the critical first weeks after installation.
In Jacksonville's sandy, fast-draining soil, thin sod struggles significantly. The shallow root zone dries out quickly, and the reduced root mass means slower establishment. What should take 2 weeks to root might take 4 to 6 weeks, during which the sod is vulnerable to stress, disease, and damage.
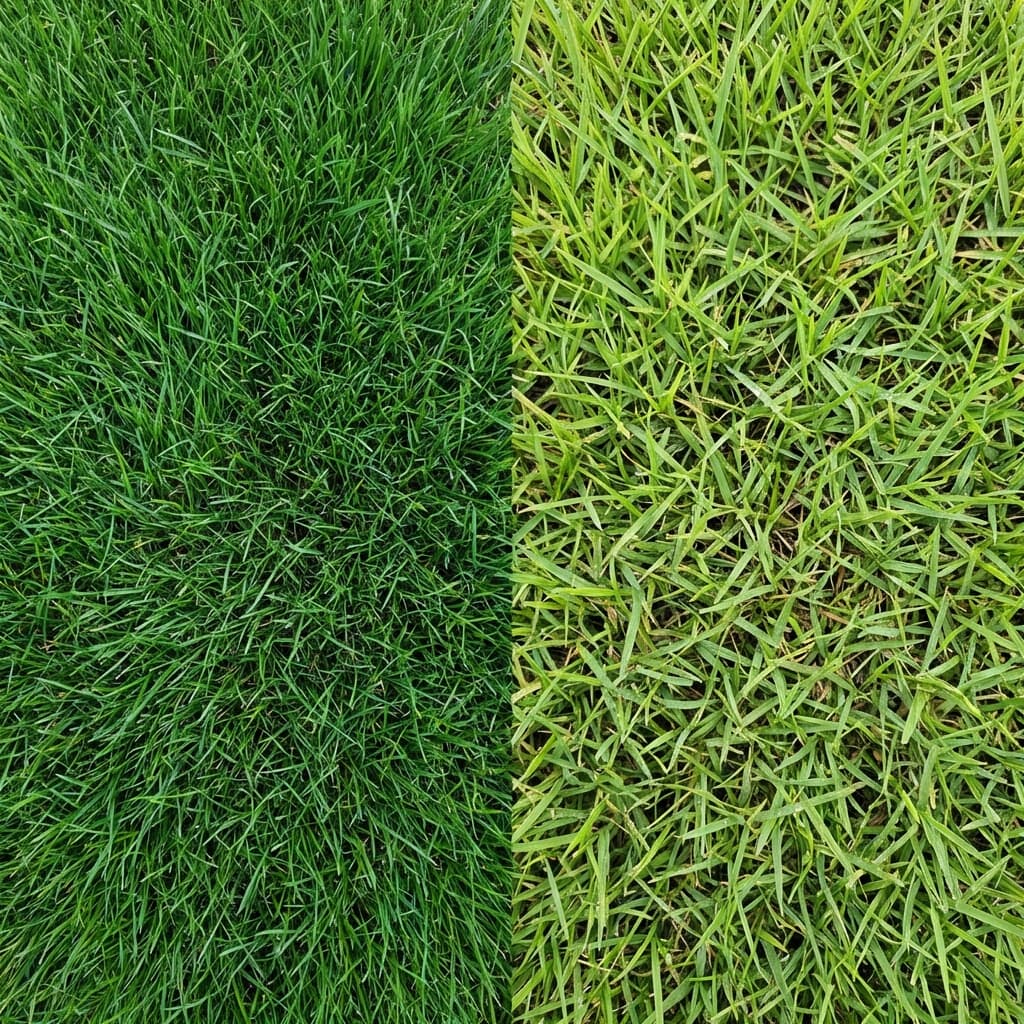
Wrong Grass Variety for the Location
The most common builder-grade grass in Jacksonville is Floratam St. Augustine. Floratam is chosen because it's inexpensive, grows quickly (important for builders who want fast green coverage), and is widely available. However, Floratam has significant drawbacks that make it less than ideal for many properties.
Floratam requires full sun—at least 6 to 8 hours of direct sunlight daily. On properties with mature trees, large shade areas from the house, or east or north-facing yards, Floratam struggles. It thins out, becomes weak, and is highly susceptible to chinch bugs and fungal diseases in shade. Many Jacksonville neighborhoods—particularly established areas like San Marco and Riverside—have substantial tree cover that makes Floratam a poor choice.
Builders use Floratam everywhere regardless of sun exposure because it's cheap and they want visual consistency across a development. This one-size-fits-all approach leaves many homeowners with grass that's fundamentally wrong for their property's conditions.
Minimal Soil Preparation
Time is money in construction, and builders rarely invest in thorough soil preparation before sod installation. Typically, the builder's landscaping crew shows up, spreads whatever soil is present, runs a quick pass with a landscape rake, and starts laying sod immediately.
There's no soil testing, no pH adjustment, no amendment with organic matter, and minimal attention to grading and drainage. Low spots hold water, high spots create dry zones, and the overall soil quality is poor. The sod is essentially installed on unprepared, often compacted fill dirt that provides a substandard growing medium.
For cost-focused builders, this minimal approach allows sod to survive long enough to look acceptable at closing—and that's all they need. Once you own the home, establishment and long-term performance are your problem.
Installation by Inexperienced Crews
Builder-grade sod is often installed by general laborers rather than professional sod installation specialists. These crews are fast, but they often make mistakes that compromise results: gaps between sod pieces, overlapping edges, pieces not rolled or tamped to ensure soil contact, inconsistent watering, and poor edge trimming.
Professional sod installers understand the details that matter—staggering seams like bricks, ensuring tight butting without overlaps, rolling after installation to eliminate air pockets, proper edge cuts around sidewalks and driveways, and initial watering schedules. Builder crews are often just trying to get the job done quickly to move on to the next house.
Upgrading from Builder Sod
If you've moved into a new construction home in Jacksonville and received builder-grade sod, you're probably wondering whether you should live with it or upgrade. The decision depends on the sod's condition, your yard's specific characteristics, and your budget.
When to Keep Builder Sod
If your builder-installed sod is rooting well, looks healthy, has appropriate coverage for your sun/shade conditions, and meets your expectations, keeping it is the practical choice. With proper care—regular watering, appropriate fertilization, and correct mowing height—even basic Floratam St. Augustine can look decent for several years before needing replacement.
Focus your energy on optimizing the care of what you have rather than immediately replacing functional sod. Establish a good watering schedule following St. Johns River Water Management District restrictions (odd addresses water Wednesday and Saturday, even addresses Thursday and Sunday), fertilize 3 to 4 times per year with a Florida-friendly fertilizer, and maintain proper mowing height (3.5 to 4 inches for St. Augustine).
When to Upgrade Immediately
If your builder sod is already showing problems within weeks of installation—large dead patches, poor rooting, extensive weed invasion, disease, or significant thinning—it's often better to replace it now rather than struggle with a problematic lawn for months or years.
Similarly, if your yard has substantial shade and the builder installed Floratam (which needs full sun), you should strongly consider upgrading to a shade-tolerant variety like Palmetto or Seville St. Augustine before the Floratam completely fails. Replacing struggling sod quickly, while the soil is still workable and before weed pressure builds, is easier and less expensive than waiting until the lawn is completely dead.
Properties with specific use cases—homes with active kids, dogs, or homeowners who want low-maintenance grass—are also good candidates for immediate upgrade. TifTuf Bermuda handles heavy traffic far better than Floratam St. Augustine, and zoysia varieties require less mowing and fertilizing than St. Augustine. If the builder installed grass that doesn't match how you'll use the lawn, upgrading early saves frustration.
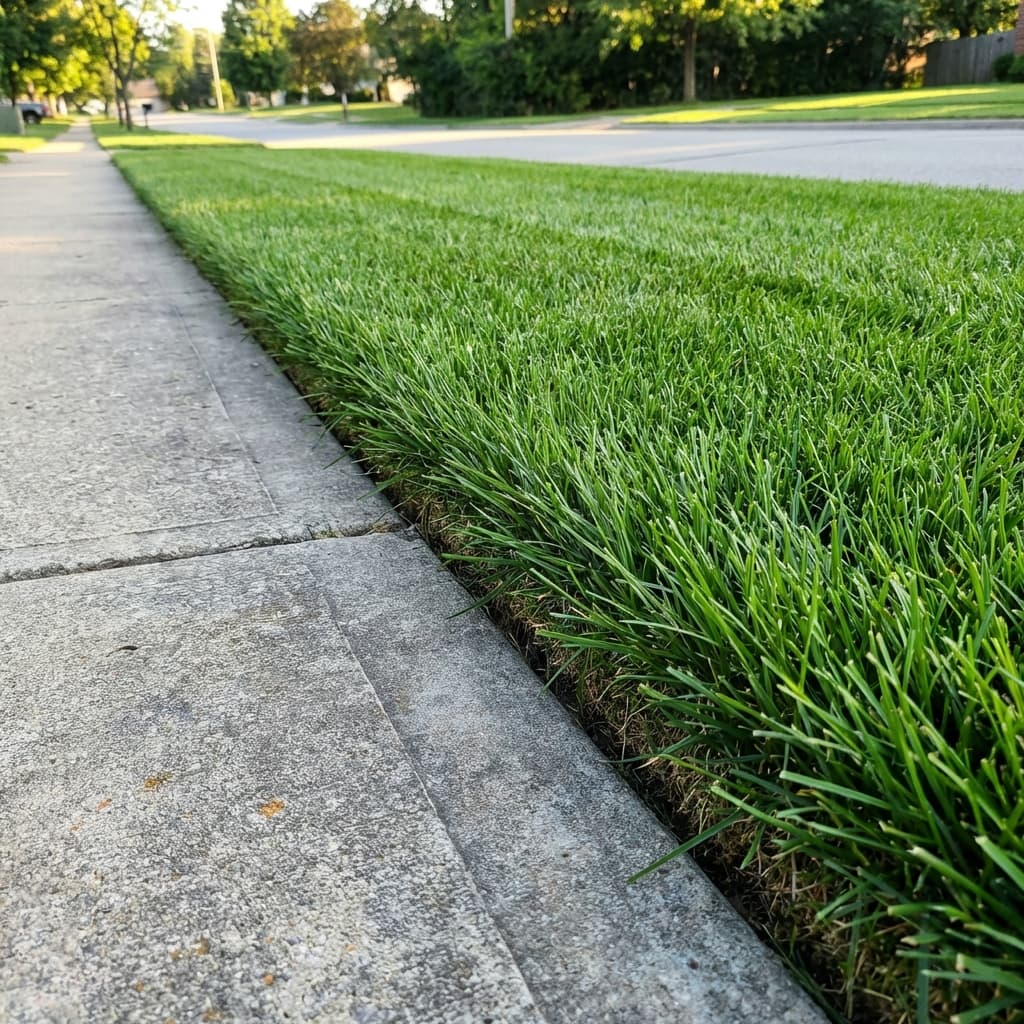
Phased Replacement Strategy
For many Jacksonville homeowners, the best approach is phased replacement. Start with the front yard, which provides curb appeal and is usually smaller than the backyard, making it more affordable. Upgrade the front with premium sod and proper soil preparation, achieving the look you want for the most visible part of your property.
Meanwhile, maintain the builder-grade sod in the backyard adequately but without major investment. When budget allows in 6 months or a year, replace the backyard with the same premium grass you installed in front.
This phased approach spreads costs, allows you to see how your chosen grass variety performs before committing the entire property, and gives immediate visual improvement to your home's street-facing appearance.
Soil Issues with New Construction
New construction properties in Jacksonville almost always have problematic soil conditions that need correction for optimal sod establishment. Understanding these issues is essential whether you're installing sod yourself or hiring a professional.
Compacted Fill Dirt
Construction involves heavy equipment—bulldozers, excavators, concrete trucks, material delivery vehicles—driving repeatedly over your property for months. This traffic severely compacts the soil, especially Jacksonville's sandy soil which compacts more easily than clay.
Compacted soil has reduced pore space, meaning less air and water infiltration. Roots struggle to penetrate compacted soil, leading to shallow root systems that make grass vulnerable to drought stress. Water pools on the surface rather than infiltrating, creating drainage problems and muddy spots.
Before installing sod on new construction, the soil must be loosened. For small areas, a rototiller can break up compaction in the top 4 to 6 inches. For larger properties or severe compaction, professional deep tilling or aeration may be needed. In extreme cases, particularly in Orange Park and Fleming Island where clay subsoils are more common, you may need to add several inches of quality topsoil over the compacted base.
Construction Debris
New construction sites inevitably leave debris in the soil—wood scraps, drywall chunks, plastic, concrete pieces, and sometimes even buried trash from workers' lunches. This debris doesn't decompose (or decomposes very slowly in the case of wood), creating dead spots where roots can't penetrate and water can't percolate.
Before sod installation, thoroughly rake the soil to remove surface debris. For subsurface debris, you may discover problems after installation when dead spots appear. In severe cases, you'll need to remove the sod in affected areas, excavate the debris, backfill with clean soil, and re-sod.
Reputable builders minimize this problem with proper site cleanup, but it's common enough that Jacksonville sod professionals always account for some debris removal in new construction projects.
Poor Quality Fill Dirt
Builders often bring in fill dirt to establish proper grades, fill low areas, or create level pads for the home. The quality of this fill varies enormously. Sometimes it's decent sandy loam. More often, it's subsoil excavated from retention ponds or house foundations elsewhere in the development—heavy, clayey, nutrient-poor material that's terrible for growing grass.
If your new construction property was substantially filled, test the soil before sod installation. Submit a sample to the UF/IFAS Extension in Jacksonville for analysis. The $7 test will reveal pH, nutrient levels, organic matter content, and basic texture.
If the fill is poor quality, you have two options: amend it heavily with compost and other organic matter to improve structure and fertility, or add 3 to 4 inches of quality topsoil over the top. For most Jacksonville homeowners, amending is more cost-effective for small areas, while adding topsoil makes sense for larger properties where amendment would be prohibitively expensive.
Grading Problems
Proper grading is essential for drainage. The soil surface should slope away from the house foundation at a minimum 2% grade (2 feet of elevation change per 100 feet of horizontal distance). Many new construction properties have inadequate grading or even reverse grading where water slopes toward the house.
Poor grading creates standing water after rain, soggy areas where grass struggles, and potentially serious foundation or flooding issues. Jacksonville's 52 inches of annual rainfall, particularly the heavy summer thunderstorms, will quickly reveal grading problems that weren't obvious during construction.
Before sod installation, verify proper grading with a string level or laser level. Correct any problems by adding or removing soil, then recheck the grade. This is much easier to fix before sod installation than after, when you'd need to remove sod, regrade, and reinstall.
Proper Soil Preparation for New Construction
Given the soil challenges common to new construction, thorough preparation is essential for long-term sod success. Here's the process Jacksonville homeowners should follow—or verify that their installer follows.
Step 1: Test and Amend the Soil
Start with a soil test from UF/IFAS Extension. The test identifies pH, nitrogen, phosphorus, potassium levels, and organic matter content. Jacksonville's sandy soil is typically acidic (pH 5.5-6.0) and very low in organic matter (often under 1%).
Most turfgrasses prefer pH 6.0 to 7.0. If your soil tests below 6.0, add lime according to test recommendations—typically 25 to 50 pounds per 1,000 square feet for Jacksonville sandy soil. If above 7.5 (less common but possible with shell-based fill), add sulfur to lower pH.
The organic matter content is equally critical. Sandy soil with less than 2% organic matter doesn't hold water or nutrients well. Add 2 to 3 inches of quality compost or composted manure and till it into the top 6 inches of soil. This dramatically improves water retention, nutrient holding capacity, and overall soil structure.
For phosphorus and potassium, follow the soil test recommendations. New construction soil is often deficient in these nutrients, and correcting deficiencies before sodding gives your grass the best start.
Step 2: Address Compaction
Use a rototiller to loosen compacted soil to a depth of 6 inches. Make two passes in perpendicular directions to thoroughly break up compaction. If you've added compost, this step simultaneously incorporates the amendment while loosening compaction.
For severe compaction or areas where equipment can't access, rent a core aerator. Make multiple passes to thoroughly perforate the soil. While this is less thorough than tilling, it's better than nothing for areas like narrow side yards.
Step 3: Establish Proper Grade and Drainage
With the soil loosened and amended, establish final grades. Use a landscape rake to smooth the surface, slope away from foundations and hardscapes, and fill any low spots. Remove high spots and redistribute that soil to low areas when possible.
Pay special attention to drainage patterns. Water should flow away from the house toward the street, swale, or rear property line. If your property backs up to a retention pond (common in Nocatee and other planned communities), ensure positive drainage toward the pond.
For properties with challenging drainage—flat lots, heavy clay subsoils, or high water tables (particularly in Nassau County near Yulee)—consider installing French drains or catch basins before sodding. Fixing drainage problems after sod installation is exponentially more difficult and expensive.
Step 4: Final Smoothing and Firming
After grading, use a lawn roller (half-filled with water) to firm the soil and reveal any remaining high or low spots. The soil should be firm enough to support your weight without sinking more than a half-inch. Too firm and the soil is compacted; too soft and the sod will settle unevenly.
Make final adjustments with a landscape rake, then water the entire area to promote settling. Wait 24 to 48 hours and check again for settling or low spots. Fill and smooth as needed.
The prepared soil surface should be 1 inch below the height of adjacent sidewalks, driveways, or patios. This allows the sod (which is typically 1 to 1.5 inches thick) to finish flush with hardscapes, creating clean edges and preventing tripping hazards.
Irrigation System Installation and Timing
Most new construction homes in Jacksonville include an irrigation system as either standard equipment or a popular upgrade. The timing of irrigation installation relative to sod installation is important for both components to work properly.
Irrigation Before Sod
Ideally, the irrigation system should be completely installed, tested, and adjusted before sod installation. This allows the installer to set sprinkler heads to the correct height—flush with the soil surface—so they'll be flush with the sod surface once grass is installed.
Installing irrigation before sod also allows you to test the system and identify dry spots, overwatered areas, or malfunctioning heads while the soil surface is visible. Adjusting coverage patterns, replacing faulty heads, or adding additional heads is easy when you can see water patterns on bare soil. Once sod is installed, it's much harder to diagnose coverage problems.
If possible, run the irrigation system for a day or two before sod delivery. This pre-waters the soil, helping sod root more quickly, and provides a final confirmation that the system works correctly.
Irrigation After Sod
Sometimes builders install sod before completing the irrigation system—typically when the system is being installed by a different subcontractor whose schedule doesn't align with the landscaping crew. This creates challenges but isn't insurmountable.
If sod goes in before irrigation, you'll need to water manually with sprinklers or hoses until the system is complete. This is labor-intensive but essential. New sod can't wait days or weeks for irrigation installation—it needs water immediately and consistently.
Once the irrigation contractor arrives, they'll need to cut through the newly installed sod to run pipes and install heads. This creates temporary disturbance and brown patches where sod is disturbed. These areas usually recover within a few weeks, but it's visually unappealing and less than ideal for establishment.
Adjusting for Sod Watering Needs
Most irrigation systems are programmed for established lawns, running 2 to 3 times per week for 30 to 45 minutes per zone. New sod requires completely different watering: daily (sometimes twice daily in summer) for shorter periods (15 to 20 minutes) to keep roots consistently moist without waterlogging.
Before sod installation, ensure you understand how to override normal programming and manually control your irrigation system. You'll need this capability for the first 2 to 3 weeks while the sod establishes, after which you can return to a normal watering schedule.
Jacksonville's watering restrictions exempt new sod for 30 days after installation, allowing you to water daily regardless of your address's normal watering days. After 30 days, you must follow St. Johns River Water Management District rules (odd addresses Wednesday and Saturday, even addresses Thursday and Sunday, no watering between 10am and 4pm).
HOA Requirements in Jacksonville Developments
Many new construction homes in Jacksonville are located in communities with homeowners associations, particularly in master-planned developments like Nocatee, communities in Deerwood and Town Center, and neighborhoods throughout St. Johns County. These HOAs typically have specific landscaping requirements that affect your sod installation decisions.
Grass Type Requirements
Some Jacksonville HOAs specify acceptable grass types or even mandate a specific variety to maintain visual consistency throughout the community. This is particularly common in high-end developments in Ponte Vedra or gated communities in Nocatee.
Before installing or upgrading sod, check your HOA's architectural review guidelines or landscaping standards. Violating these requirements can result in fines or forced removal of non-compliant landscaping. If the HOA requires a specific grass type that you don't want, you may be able to petition for an exception, particularly if you have shade conditions that make the required grass unsuitable.
Timeline Requirements
Many HOAs require front yard landscaping, including sod installation, within a specific timeframe after closing—commonly 60 to 90 days. This requirement prevents homes from sitting with bare dirt or mud for extended periods, which affects neighboring property values and community appearance.
If you declined builder sod to upgrade later, be aware of your HOA's timeline requirements. Missing the deadline can result in daily fines until landscaping is complete. Plan your sod installation to comply with HOA timelines, even if the timing isn't ideal from a seasonal standpoint.
Maintenance Standards
HOAs in areas like Baymeadows, Atlantic Beach, and Jacksonville Beach often enforce lawn maintenance standards: maximum allowable grass height, weed coverage thresholds, percentage of dead or brown grass allowed, and edge trimming requirements.
These standards affect your choice of grass type. If your HOA is particularly strict, choose grass varieties that look good with minimal maintenance. TifTuf Bermuda and zoysia varieties like Empire stay naturally dense and require less frequent mowing than St. Augustine. Shade-tolerant varieties like Palmetto St. Augustine maintain better appearance in mixed sun/shade yards than Floratam, reducing the risk of HOA complaints about thin or patchy grass.
Irrigation System Requirements
Some Jacksonville HOAs require automatic irrigation systems rather than allowing manual watering. If your builder didn't include irrigation as standard, and your HOA requires it, you'll need to install a system before or immediately after sod installation.
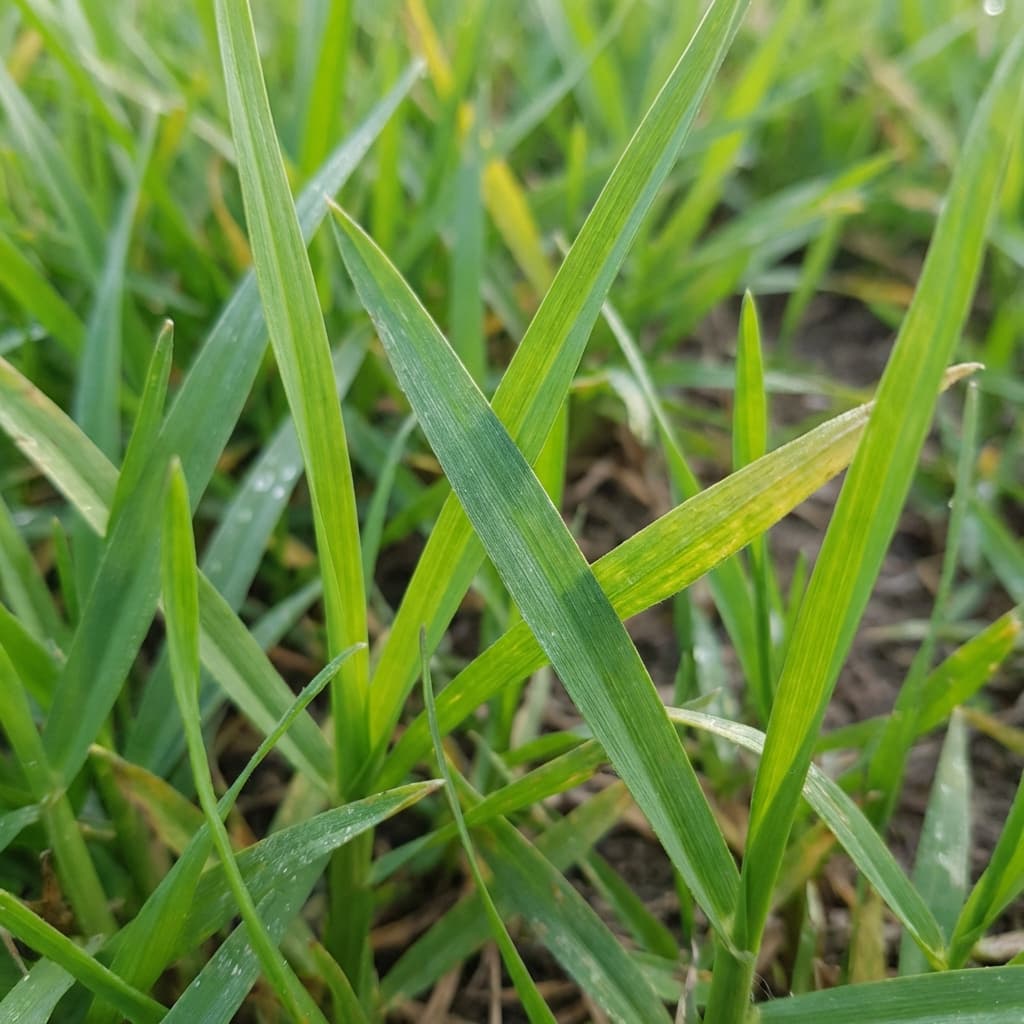
Choosing the Right Grass for Your New Jacksonville Home
With proper soil preparation and timing, the right grass variety can thrive on your new construction property. Here's how to choose among the options available in Jacksonville.
For Full Sun Properties
If your lot has minimal tree cover and the lawn areas receive 6 or more hours of direct sun daily, you have the widest variety of choices.
TifTuf Bermuda: The best choice for full sun, heavy traffic, and homeowners who want a low-maintenance, drought-tolerant lawn. TifTuf has the highest drought tolerance of any warm-season grass, uses 38% less water than St. Augustine, handles foot traffic and pet activity better, and maintains excellent density with less fertilizer. It goes dormant and brown in winter but greens up beautifully in spring. Ideal for Mandarin, Southside, and Orange Park new construction homes with full sun.
St. Augustine (CitraBlue or Palmetto): For homeowners who want a lush, green, wide-bladed grass that stays green year-round. Both varieties handle Jacksonville's full sun well while tolerating light shade better than Floratam. CitraBlue has superior cold tolerance, while Palmetto is better in moderate shade. Both resist chinch bugs better than Floratam.
Zoysia (Empire or Zeon): Premium option for full sun with moderate traffic. Zoysia is slower-growing than Bermuda or St. Augustine, meaning less frequent mowing. It's dense, attractive, and drought-tolerant once established. Empire is the most shade-tolerant zoysia, while Zeon has the finest texture and softest feel. Popular in upscale Ponte Vedra and Nocatee neighborhoods.
For Shade or Mixed Sun/Shade
Properties with mature trees, large covered patios, or homes that shade portions of the yard require shade-tolerant varieties.
Palmetto St. Augustine: The most shade-tolerant grass commonly available in Jacksonville. Palmetto thrives with just 4 to 5 hours of direct sun or bright filtered shade. It's the standard choice for Riverside, Avondale, and San Marco properties with substantial tree cover.
Seville St. Augustine: Similar shade tolerance to Palmetto but with a finer texture and lower growth habit. Seville creates a denser, carpet-like lawn. It's less common than Palmetto but worth considering for homeowners who want fine-textured grass with good shade performance.
Empire Zoysia: Handles partial shade better than other zoysia varieties. Not as shade-tolerant as Palmetto St. Augustine but acceptable in areas with 4 to 6 hours of sun. Good choice for homeowners who want zoysia's low maintenance but have some shade.
For High Traffic and Pets
Homes with kids, dogs, or frequent entertaining need grass that tolerates heavy use.
TifTuf or Celebration Bermuda: These varieties handle traffic better than any other option. They recover quickly from damage, resist wear, and maintain density under heavy use. The downside is winter dormancy—the grass turns brown from December to March.
CitraBlue St. Augustine: The most traffic-tolerant St. Augustine variety, though still not as durable as Bermuda. CitraBlue recovers better from damage than Floratam or Palmetto and maintains density under moderate foot traffic.
Empire Zoysia: Excellent wear tolerance and recovery. Handles foot traffic nearly as well as Bermuda but stays green year-round. The slower growth rate means repairs take longer than Bermuda but still much faster than St. Augustine.
Working with Builders vs. Independent Installers
New construction homeowners face a choice: accept the builder's standard sod package, upgrade through the builder's options, or decline builder sod and hire an independent installer after closing.
Builder Advantages
The main advantage of builder-installed sod is convenience. The lawn is installed before closing, costs are rolled into your mortgage, and you have no additional project to manage immediately after moving. For new homeowners with limited time, cash flow constraints, or no interest in lawn decisions, accepting builder sod is the path of least resistance.
Some builders offer upgrade options—premium grass varieties or enhanced soil preparation—for additional cost. If these upgrades are available and reasonably priced, they can be worth considering.
Independent Installer Advantages
Hiring an independent sod installation company like Jax Sod after closing provides complete control over grass variety, quality, installation practices, and timing. You're not limited to the builder's one-size-fits-all approach.
Independent installers typically provide superior soil preparation, including soil testing, amendments, compaction relief, and proper grading. The quality of sod is usually higher—thicker cuts with better root development. Installation crews are sod specialists rather than general construction laborers, resulting in better technique and attention to detail.
The cost difference is often smaller than homeowners expect. If the builder offers a $2,000 sod allowance and credits you $1,500 if you decline, professional sod installation might cost $3,500 to $4,500, meaning you're paying $2,000 to $3,000 out of pocket for dramatically better results.
At Jax Sod, we install many lawns on new construction properties in Jacksonville, often for homeowners who saw their neighbors' builder-grade sod struggling and decided to upgrade before making the same mistake.
Ready to Install Sod on Your New Construction Home?
New construction sod installation in Jacksonville requires careful attention to timing, soil preparation, grass selection, and installation quality. While accepting builder-grade sod is convenient, the long-term benefits of upgrading to quality grass and professional installation far outweigh the additional investment.
At Jax Sod, we specialize in new construction sod installation throughout Northeast Florida. Our team has extensive experience working with Jacksonville's sandy soil, addressing the specific challenges of new construction sites, and selecting the right grass varieties for each property's unique conditions.
We offer complete installation services including old vegetation removal (if applicable), soil testing, amendment with organic matter, grading and drainage correction, professional sod installation using premium grass varieties, irrigation system adjustment assistance, and detailed post-installation care instructions.
Whether you're building in Nocatee, Fruit Cove, Fleming Island, St. Johns, Orange Park, or any Jacksonville-area community, we'll ensure your new lawn establishes successfully and provides beauty and enjoyment for years to come.
Ready to install premium sod on your new construction home? Contact Jax Sod today at (904) 901-1457 or visit jaxsod.com for a free estimate. Let our local experience work for you.
Need Professional Sod Installation?
Jax Sod provides sod installation, sod replacement, and new lawn installation across Jacksonville and Northeast Florida. Free quotes!
Related Articles
Sod Installation for New Construction Homes in Jacksonville
Just built a new home? Here's what you need to know about sodding your new construction lot--timing, builder coordination, and common pitfalls to avoid.
Bartram Park Jacksonville Sod Installation: Complete Guide for New Lawns
Everything you need to know about sod installation in Bartram Park. From soil prep to variety selection, learn how to establish a beautiful new lawn in Jacksonville's climate.
10 Sod Installation Mistakes to Avoid in Jacksonville
Avoid costly sod installation mistakes in Jacksonville. Learn the top 10 errors homeowners make and how to install your lawn correctly the first time.
Get Started
Ready for a New Lawn?
Get a free, no-obligation quote from Jax Sod for sod installation, sod replacement, or a new lawn in the Jacksonville area.
(904) 901-1457