10 Sod Installation Mistakes to Avoid in Jacksonville
Installing new sod is one of the best ways to transform your Jacksonville property with an instant, beautiful lawn. Whether you're renovating a tired yard in Riverside, landscaping new construction in Nocatee, or replacing failed grass in Mandarin, sod provides immediate curb appeal and enjoyment that seeding can't match.
However, sod installation is more complex than it appears. What looks like a simple process—remove old grass, lay new sod, water, done—actually involves dozens of details that separate successful installations from disappointing failures. At Jax Sod, we have seen the same installation mistakes across Northeast Florida, including failed installs that needed repair or replacement where homeowners or inexperienced contractors made critical mistakes.
The good news is that most sod installation failures are completely preventable. They result from simple errors—shortcuts taken, steps skipped, or misinformation—rather than inherently difficult challenges. Understanding what not to do is just as important as knowing correct procedures.
In this comprehensive guide, we'll walk through the ten most common sod installation mistakes we see in Jacksonville, explain why each one causes problems, and show you the right way to achieve a beautiful, long-lasting lawn.
1. Not Testing or Amending the Soil
The single most common mistake in Jacksonville sod installation is neglecting soil preparation. Many homeowners and contractors treat sod like carpet—just roll it out over whatever soil exists and assume it will grow. This couldn't be further from reality.
Why This Fails
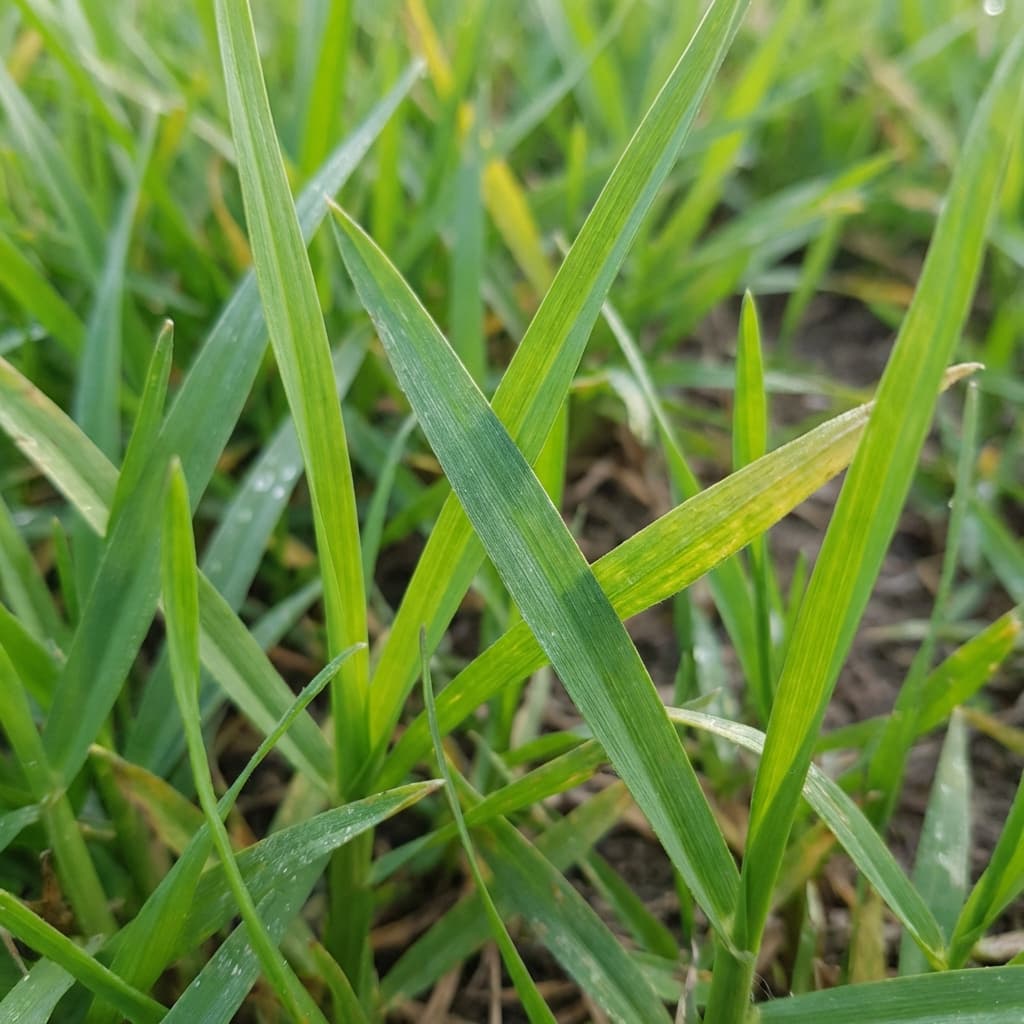
Sod is a living plant that depends entirely on the soil beneath it for water, nutrients, and physical support. Jacksonville's native sandy soil is notoriously poor for growing grass without amendment. It's highly acidic (typically pH 5.5-6.0), contains minimal organic matter (often less than 1%), drains too quickly to retain moisture, and leaches nutrients rapidly.
When you install sod on unprepared Jacksonville sand, the grass survives initially on the nutrients and moisture in the root zone soil it was cut with. But within 2 to 4 weeks, those reserves are depleted, and the grass must rely on the native soil. At that point, problems emerge: slow rooting, yellowing (nitrogen deficiency), poor drought tolerance, and vulnerability to stress and disease.
The Right Way
Before installing sod in Jacksonville, always test your soil through the UF/IFAS Extension office. The $7 test reveals pH, nitrogen, phosphorus, potassium levels, and organic matter content. The results provide specific amendment recommendations for your property.
Most Jacksonville soil needs three amendments:
Lime: If pH is below 6.0 (very common), add lime at 25 to 50 pounds per 1,000 square feet to raise pH into the optimal 6.0-7.0 range. Grass roots cannot efficiently absorb nutrients outside this pH range, even if nutrients are present.
Organic matter: Add 2 to 3 inches of quality compost or composted manure and till it into the top 6 inches of soil. This transforms sand's water and nutrient retention from terrible to acceptable, dramatically improving sod establishment and drought tolerance.
Starter fertilizer: Apply a phosphorus-heavy starter fertilizer (such as 5-10-15 or similar analysis) before laying sod. Phosphorus promotes root development, exactly what new sod needs.
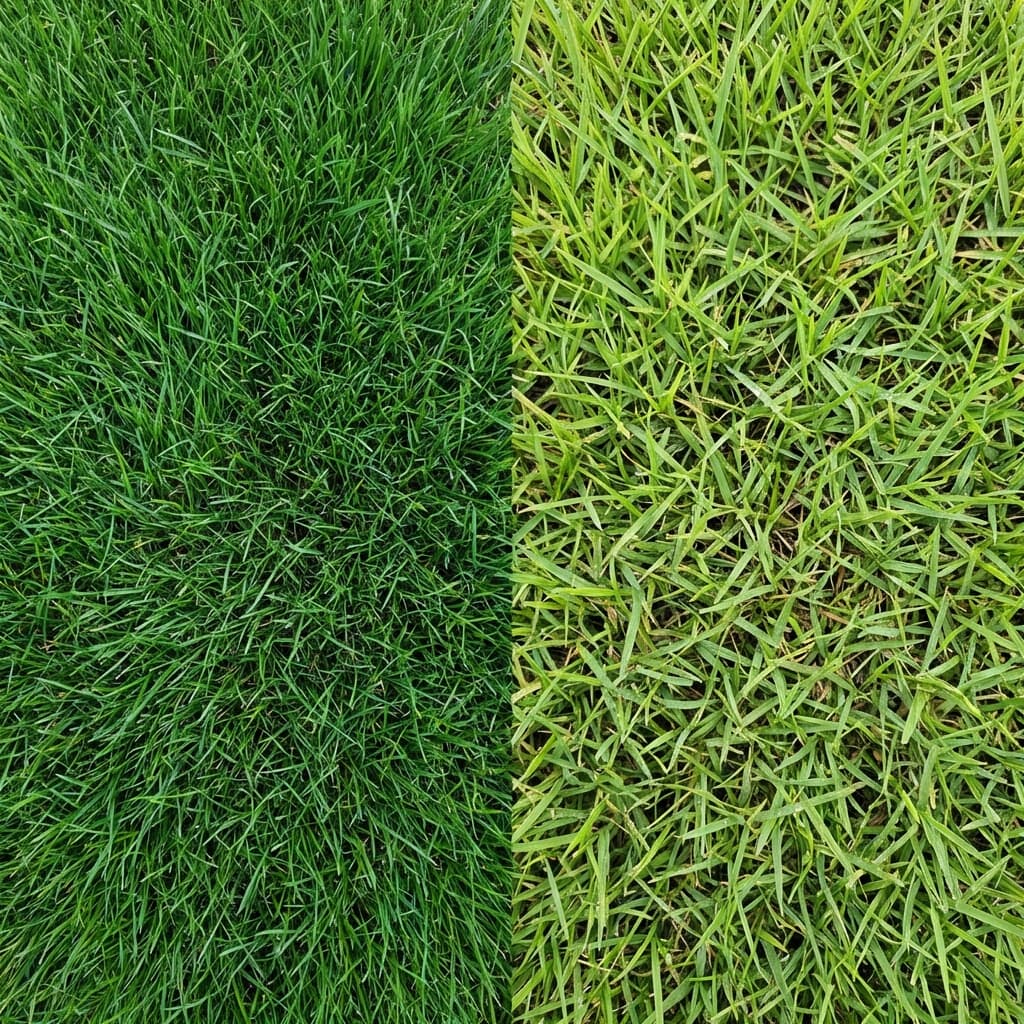
In neighborhoods from San Marco to Ponte Vedra, we've seen the dramatic difference proper soil preparation makes. Properties with amended soil establish in 2 weeks with deep green color, while properties with unprepared sand struggle for months with yellow, patchy grass.
Jacksonville Pro Tip: Clay County properties (Orange Park, Fleming Island, Middleburg) sometimes have clay subsoil beneath sandy topsoil. If your soil test reveals heavy clay, add extra organic matter and consider installing drainage to prevent waterlogging during Jacksonville's wet summer months.
2. Laying Sod Over Existing Grass
This mistake is so common and so problematic that homeowners frequently ask if it's acceptable. The answer is an unequivocal no, yet many Jacksonville residents try it anyway, tempted by the labor savings of not removing old turf.
Why This Fails
Laying new sod over existing grass creates a layered structure where the new sod's roots encounter a barrier of old grass instead of soil. This prevents root-to-soil contact, creates air pockets, transfers diseases and pests from old to new grass, and causes decomposition problems as the buried grass breaks down.
The new sod may look acceptable for a few weeks, surviving on moisture and nutrients in its root zone. But as roots try to penetrate downward, they can't push through the organic barrier of old grass. The sod remains shallow-rooted, vulnerable to drought, and struggles increasingly as weeks pass. Within 2 to 4 months, the lawn typically fails completely.
Jacksonville's sandy soil amplifies this problem because sand doesn't retain moisture well. Shallow-rooted sod on sand requires constant watering—sometimes twice daily in summer—and still browns out during dry periods. The old grass layer beneath decomposes irregularly, creating uneven settling, air pockets, and a spongy, unstable surface.
The Right Way
Always remove existing grass completely before installing sod. In Jacksonville, the three effective removal methods are:
Sod cutter: Rent a mechanical sod cutter ($90-$150 per day) that slices horizontally beneath the grass, cutting through roots and removing the turf in strips. This is the fastest method for areas larger than 1,000 square feet and works particularly well in Jacksonville's sandy soil.
Herbicide: Apply glyphosate (Roundup) to kill grass, wait 7-14 days for complete die-off, then rake up the dead material. This works well but requires advance planning for the waiting period. Best for fall or winter installations when dead grass isn't a fire hazard.
Manual removal: For small areas (under 500 square feet), you can use a flat shovel or garden spade to manually cut and remove grass. This is labor-intensive but requires no equipment rental or chemical use.
After removal, prepare the soil properly with testing, amendments, and grading before installing sod. The few hours saved by skipping removal aren't worth the months of problems it creates.
3. Choosing the Wrong Grass Type for Conditions
Jacksonville's climate allows many grass types to grow, but not all grass varieties thrive in all conditions. Choosing grass based on price alone—or accepting whatever the supplier has available—often results in a lawn that looks acceptable initially but declines over time.
Why This Fails
The most common example in Jacksonville is installing Floratam St. Augustine in shade. Floratam requires 6 to 8 hours of direct sun daily and struggles in anything less. Many Jacksonville properties in established neighborhoods like Avondale, Riverside, and San Marco have substantial tree cover that creates partial to heavy shade.
Floratam installed in shade thins out, becomes weak and spindly, is highly susceptible to chinch bug damage, and develops fungal diseases like gray leaf spot. Homeowners invest in sod, maintenance, and pest control trying to maintain grass that's fundamentally wrong for the location.
Other common mismatches include Bermuda grass (which goes dormant and brown in winter) for homeowners who want year-round green color, high-maintenance St. Augustine for homeowners who want low-input lawns, and fine-textured zoysia for high-traffic play areas.
The Right Way
Choose grass based on your property's specific conditions and your lifestyle needs:
For shade (under 6 hours of sun): Palmetto or Seville St. Augustine handle partial shade best. Palmetto thrives with as little as 4 hours of sun or bright filtered light. Empire zoysia tolerates light shade but not as well as Palmetto.
For full sun and low maintenance: TifTuf or Celebration Bermuda are best. They use 30-40% less water than St. Augustine, require less fertilizer, and handle Jacksonville's summer heat and drought better than any other grass. The tradeoff is winter dormancy (brown from December to March).
For year-round green with moderate maintenance: CitraBlue or Palmetto St. Augustine provide lush, wide-bladed grass that stays green in winter. CitraBlue handles some shade and has better cold tolerance. Palmetto is better in heavier shade.
For low traffic and premium appearance: Empire or Zeon zoysia create a dense, carpet-like lawn with fine texture. Zoysia is slower-growing, meaning less frequent mowing, and has excellent drought tolerance once established.
At Jax Sod, we consult with every customer about sun exposure, intended use, pets, maintenance preferences, and aesthetic goals before recommending grass varieties. This ensures the grass fits the property rather than forcing the property to accommodate the wrong grass.
4. Not Watering Immediately After Installation
New sod is under extreme stress. It's been cut from its root environment, stacked on pallets, transported, and laid on unfamiliar soil. The roots are severed and must regenerate to establish in the new location. Proper watering immediately after installation is absolutely critical to survival and establishment.
Why This Fails
Sod begins drying out the moment it's cut at the farm. Even if installed within 24 hours—the ideal timeframe—the grass is already stressed. If the newly installed sod doesn't receive water immediately, the root zone dries out, roots desiccate, and the grass enters severe stress or dies.
Jacksonville's climate makes immediate watering even more critical. Summer temperatures reach the low 90s, humidity is high, and direct sun can heat sod surface temperatures above 110°F. Dry sod in these conditions can be dead within hours.
We've been called to properties in Southside, Baymeadows, and Atlantic Beach where homeowners installed sod late in the day and decided to start watering "tomorrow morning." By the next day, the sod was already browning and crunchy at the edges. Once sod desiccates, recovery is difficult or impossible.
The Right Way
Water new sod immediately upon installation—within 30 minutes of laying each section if possible. Don't wait until the entire lawn is installed to start watering. As each pallet is laid, start watering that area while continuing installation elsewhere.
The initial watering should be heavy enough to soak through the sod and wet the top 2 to 3 inches of soil beneath. This ensures good root-to-soil contact and rehydrates the stressed grass.
For the first 7 to 14 days, water new Jacksonville sod daily, sometimes twice daily in hot weather. Each watering should provide about 0.5 inches of water (measure with a rain gauge or tuna can). The goal is keeping the root zone consistently moist without waterlogging. Early morning is the best time, with a second watering in early afternoon if sod shows stress (gray-blue color, footprints remain visible, curled leaf blades).
After 2 weeks, as roots establish, gradually reduce watering frequency while increasing duration. By week 3 or 4, transition to a normal established lawn schedule: 2 to 3 times per week providing 0.75 to 1 inch per watering.
Jacksonville's irrigation restrictions exempt new sod for 30 days, allowing daily watering regardless of your property's normal watering days. After 30 days, follow St. Johns River Water Management District rules (odd addresses Wednesday/Saturday, even addresses Thursday/Sunday).
5. Installing in the Wrong Season
While sod can technically be installed year-round in Jacksonville's mild climate, timing significantly affects establishment success and the amount of care required. Poor timing doesn't guarantee failure but stacks the odds against you.
Why This Fails
The worst time for sod installation in Jacksonville is mid-summer (July and August). Temperatures are highest, humidity is oppressive, and afternoon thunderstorms create a cycle of intense heat followed by soaking rain—conditions that stress new sod and promote fungal diseases like brown patch and gray leaf spot.
Summer sod requires heroic watering—often twice daily—and even with perfect irrigation, establishment is slow and stress is high. The grass may survive but will struggle, particularly St. Augustine varieties that are prone to summer fungal issues. Additionally, Jacksonville's severe summer heat makes installation labor extremely uncomfortable and increases the risk of heat-related illness for DIY installers.
Winter installation (December through February) doesn't risk heat stress but creates different problems. Warm-season grasses like St. Augustine, Bermuda, and zoysia grow minimally in cool weather. Sod installed in January may take 6 to 8 weeks to fully root instead of the normal 2 to 3 weeks. During this extended vulnerable period, the sod is susceptible to damage from foot traffic, pets, weed invasion, and disease.
The Right Way
The best seasons for sod installation in Jacksonville are spring (March through May) and fall (September through November). Temperatures are moderate, rainfall is generally adequate but not excessive, and grass grows actively, promoting quick establishment.
Spring installation: Grass emerges from winter dormancy and enters vigorous growth. Sod installed in April roots within 2 weeks and develops a deep, drought-resistant root system before summer heat arrives. This is ideal timing for properties in Nocatee, Fruit Cove, or St. Johns where summer water restrictions might limit irrigation.
Fall installation: September and October offer excellent conditions with warm soil for root growth but decreasing air temperatures that reduce stress. Sod installed in fall establishes well before winter dormancy and enters spring with a mature root system ready for vigorous growth. This timing is particularly good for Bermuda grass, which establishes quickly in fall and then winters over, emerging strong in spring.
If you must install sod during less ideal periods, adjust your care accordingly. Summer sod requires more frequent watering, possible shade cloth over the most exposed areas during the first week, and vigilant disease monitoring. Winter sod needs patience, minimal traffic, and understanding that establishment will be slow but successful.
6. Poor Grading and Drainage
Proper grading is often overlooked by DIY installers and even some professional crews, yet it's fundamental to long-term lawn success. Jacksonville receives 52 inches of rainfall annually, much of it concentrated in summer thunderstorms that can drop 2 to 3 inches in an hour.
Why This Fails
Without proper grading, water stands in low spots, creating constantly wet areas where grass roots suffocate (roots need oxygen), fungal diseases thrive, and the lawn becomes muddy and unusable. Conversely, high spots dry out quickly in Jacksonville's sandy soil, creating patches that turn brown during dry periods despite irrigation.
Poor grading also creates mowing problems. High spots get scalped by mower blades, weakening the grass and creating opportunities for weed invasion. Low spots are missed by mower blades, leaving taller grass that looks uneven and unprofessional. Many HOAs in areas like Deerwood, Town Center, and Baymeadows have appearance standards that problematic grading makes difficult to meet.
The most serious grading error is negative slope toward house foundations. This channels rainwater toward the house instead of away from it, potentially causing foundation damage, basement flooding (rare in Jacksonville but possible), and interior moisture problems.
The Right Way
Before installing sod, establish proper grades with these principles:
Slope away from foundations: The soil surface should slope away from your house at a minimum 2% grade—2 feet of elevation drop per 100 feet of distance. For the first 10 feet adjacent to the foundation, a steeper 5% slope is even better.
Eliminate low spots: Fill depressions with clean sand (Jacksonville's native soil type) or sandy loam. Compact the fill, water it, and allow it to settle before final grading. Large depressions may require multiple filling and settling cycles.
Smooth out high spots: Remove excess soil from high areas and redistribute it to low areas when possible. The goal is an even grade with smooth transitions—no bumps, dips, or sudden elevation changes.
Direct water to drainage points: Establish a clear path for water to flow from your lawn to the street, swale, retention pond, or rear property line. In developments like Nocatee or communities in St. Johns County with retention pond systems, ensure positive drainage toward these engineered drainage features.
Create a smooth surface: After major grading, use a landscape rake to smooth the soil surface. Remove rocks, debris, and clumps. Then use a lawn roller half-filled with water to firm the soil and reveal any remaining imperfections. Make final adjustments until the surface is uniformly smooth and firm.
For properties with challenging drainage—flat lots, clay subsoil, or high water tables (common in coastal areas like Neptune Beach or Atlantic Beach)—consider installing French drains or catch basins before sodding. This infrastructure prevents chronic wet areas that no amount of post-installation effort can fix.
7. Leaving Gaps Between Sod Pieces
Sod should be installed like brickwork—pieces tightly butted together with staggered seams. Gaps between pieces are one of the most common errors we see in DIY installations and even in work by inexperienced contractors.
Why This Fails
Gaps between sod pieces create several problems. First, the exposed soil dries out quickly in Jacksonville's heat and sun, creating dry zones that prevent adjacent pieces from rooting properly. Second, gaps provide openings for weed seeds to germinate. A 1-inch gap can sprout dozens of weeds within two weeks, creating immediate weed pressure in your new lawn.
Third, gaps often widen over time as sod pieces shrink during the first week after installation (sod naturally loses some moisture even with proper watering). A small gap at installation can become a 2 to 3-inch strip of bare ground within days.
Finally, gaps create an unprofessional appearance. The seams are highly visible, and the lawn looks like a quilt rather than an integrated turf. Many Jacksonville HOAs have standards that prohibit visible gaps or bare areas in lawns.
The Right Way
Install sod pieces tightly butted against each other with no gaps. Push pieces firmly together so edges touch along their entire length. Don't overlap pieces—this creates double-thickness seams that are visible as stripes and can die from poor air circulation. The edges should just kiss each other.
Stagger the seams like bricks in a wall. If one row has a seam at 5 feet, the next row should have a seam at 2.5 feet or 7.5 feet, not at 5 feet. This pattern prevents long, visible seam lines and creates a more integrated appearance. It also distributes stress more evenly as the sod establishes.
For curves, edges, and obstacles like sprinkler heads or trees, cut sod pieces to fit precisely using a sharp knife or flat shovel. Make clean, straight cuts rather than tearing or forcing pieces. Small pieces (less than 2 feet long) are less stable and prone to drying out, so avoid creating them when possible by adjusting the layout.
After installation, roll the lawn with a half-full lawn roller to ensure good contact between sod and soil and to press pieces tightly together. This step is often skipped but makes a significant difference in establishment quality.
8. Not Rolling After Installation
Rolling newly installed sod is a step that many DIY installers skip, either because they don't know it's important or because they don't want to rent a roller. This is a mistake that compromises establishment.
Why This Fails
Even with careful installation, air pockets form beneath sod pieces. These gaps prevent roots from contacting soil, create dry zones where roots can't access moisture, and make the lawn surface spongy and uneven. Air pockets are particularly problematic in Jacksonville's sandy soil, which doesn't conform to sod contours as well as heavier soils.
Without rolling, sod pieces may also separate slightly at seams, creating gaps. The uneven surface becomes apparent when mowing—the mower rocks on high spots and low areas, blades scalp high sections while missing low areas, and the result is an uneven cut that looks unprofessional.
The Right Way
After installing sod, roll the entire lawn with a lawn roller half-filled with water. The roller weight presses sod firmly against the soil, eliminating air pockets and ensuring good root-to-soil contact. It also presses seams together, creating tight joints between pieces.
Lawn rollers are rentable from equipment rental companies in Jacksonville for about $25-$40 per day. For a typical residential lawn (2,000-3,000 square feet), rolling takes 30 to 60 minutes—a small time investment for significantly better establishment.
Fill the roller half-full, not completely full. A half-full roller weighs about 150-200 pounds—enough to press sod effectively without compacting the soil beneath. A completely full roller (300-400 pounds) can compact the soil, especially sandy soil, reducing oxygen availability to roots and creating future problems.
Make overlapping passes covering the entire lawn. Pay special attention to seams, edges, and areas where pieces weren't perfectly flat during installation. After rolling, water the lawn again to settle any remaining gaps and provide moisture.
Jacksonville Pro Tip: If you can't access a roller, you can achieve similar results by walking over every square foot of the new sod. This is time-consuming but effective for small areas. Walk with normal stride, letting your weight press the sod down. For larger areas, rolling is much more practical.
9. Mowing Too Soon After Installation
New sod needs time to root before it can withstand mowing traffic. Mowing too early disrupts root establishment, can pull partially rooted sod pieces loose, and stresses the grass at its most vulnerable stage.
Why This Fails
When sod is first installed, it has no roots penetrating into the soil beneath. The grass is held in place only by its own weight and the initial contact with the soil surface. As roots grow downward and establish, the sod becomes anchored.
If you mow before roots are established, the mower wheels can shift or pull up sod pieces. Even if pieces don't lift completely, the weight and vibration of the mower disrupts newly forming roots. This delays establishment, potentially by several weeks in extreme cases.
Additionally, mowing is stressful to grass. The plant must redirect energy from root development to healing and regenerating the cut leaf blades. New sod needs every bit of energy focused on rooting, not on recovering from mowing.
The Right Way
Wait at least 14 days after installation before the first mowing in Jacksonville—longer if installation occurred during slow-growth winter months. Test whether sod is ready by attempting to lift a corner of a piece. If it resists lifting and you feel roots pulling, it's rooted sufficiently for mowing. If it lifts easily with no resistance, wait longer.
For the first mowing, raise your mower deck higher than normal—at least 4 inches for St. Augustine. Cut only the top 1/3 of the grass blade length. This light trim removes just enough to keep the grass at a reasonable height without stressing it.
Ensure mower blades are sharp. Dull blades tear grass rather than cutting it cleanly, creating ragged edges that turn brown and increase disease susceptibility. In Jacksonville's humid climate, torn grass blades are particularly prone to fungal infection.
Keep the mower light. If possible, use a walk-behind mower rather than a riding mower for the first cut. Less weight means less compaction and less stress on newly established roots. Keep the mower bag empty or only partially full to minimize weight.
After the first mowing, return to a normal cutting schedule. For St. Augustine, this means mowing when grass reaches 4 to 5 inches, cutting back to 3.5 to 4 inches. For Bermuda, mow at 1.5 to 2.5 inches. For zoysia, maintain 2 to 3 inches. Never remove more than 1/3 of the blade length in a single mowing.
10. Wrong Watering Schedule After Installation
Even homeowners who water correctly during the first few days often make mistakes with the ongoing watering schedule as sod establishes. Either they continue daily watering too long (encouraging shallow rooting) or they reduce watering too quickly (stressing the grass before it's fully established).
Why This Fails
New sod initially needs frequent, light watering to keep surface roots moist. But once roots begin penetrating the soil—typically after 5 to 7 days—the watering schedule needs to gradually transition toward deeper, less frequent watering that encourages deep root growth.
If you continue daily light watering for weeks, roots remain concentrated in the upper inch of soil where moisture is consistently available. These shallow roots make the lawn vulnerable to drought, heat stress, and damage. The grass becomes dependent on daily watering and struggles any time irrigation is reduced.
Conversely, reducing watering too quickly before roots are established stresses the grass. If you switch from daily watering to twice-weekly watering at day 10, and roots have only penetrated 1 inch deep into Jacksonville's sandy soil, the root zone will dry out between waterings. The grass shows stress (gray-blue color, wilting), establishment slows, and the lawn struggles.
The Right Way
Follow this progressive watering schedule for Jacksonville sod:
Days 1-7: Water daily, providing 0.5 inches per watering. In summer heat, water twice daily (early morning and early afternoon) if the sod shows stress. Keep the root zone consistently moist but not soggy.
Days 8-14: Continue daily watering but begin checking root establishment. Attempt to lift a corner of a sod piece. If roots resist pulling, the grass is rooting. Continue daily watering until sod resists lifting across the entire lawn.
Days 15-21: Once sod is rooted, transition to every-other-day watering while increasing duration to provide 0.75 inches per watering. This begins encouraging roots to grow deeper to access moisture between waterings.
Days 22-30: Reduce frequency to every third day while increasing duration to provide 1 inch per watering. Roots should now be established 2 to 3 inches deep, able to access moisture even with longer intervals between watering.
After day 30: Transition to a normal established lawn schedule. In Jacksonville, this typically means twice per week (following St. Johns River Water Management District restrictions), providing 1 to 1.5 inches per watering. Water deeply to encourage deep roots and drought tolerance.
Adjust this schedule based on weather conditions. If Jacksonville experiences a heavy rain, skip the next scheduled watering. During unusually hot, dry periods in summer, you may need to add an extra watering. In cooler spring or fall weather, you can reduce frequency faster.
Monitor the grass for stress signals. Grass showing stress (footprints remaining visible after walking, gray-blue color, or blade curling) needs more water. Grass that's always soft and wet, stays soggy, or shows fungal disease needs less water or better drainage.
Ready for a Professional Installation?
Avoiding these ten common mistakes dramatically increases your chances of sod installation success in Jacksonville. However, even armed with knowledge, DIY sod installation is a significant project requiring proper equipment, physical labor, and attention to numerous details.
At Jax Sod, we've perfected our installation process through years of experience across Northeast Florida. Our professional crews avoid all these common mistakes because they're trained in proper techniques and held accountable to high standards. We test and amend soil, remove old grass completely, select appropriate grass varieties for each property's conditions, ensure immediate and correct watering, time installations seasonally for optimal results, establish proper grading and drainage, install sod with tight seams, roll after installation, provide clear maintenance instructions, and support customers through the critical establishment period.
We serve all of Duval, Clay, St. Johns, and Nassau Counties—from Jacksonville Beach to Yulee, from Middleburg to Ponte Vedra. We carry premium grass varieties including multiple St. Augustine varieties (Palmetto, CitraBlue, Floratam, Seville), Bermuda varieties (TifTuf, Celebration, Tifway 419), zoysia varieties (Empire, Zeon, Palisades), and bahia grass.
Whether you're renovating a tired lawn in San Marco, landscaping new construction in Nocatee, upgrading from builder sod in Fruit Cove, or transforming a struggling yard in Mandarin, we provide the expertise, quality materials, and professional installation that ensure beautiful results.
Ready to install sod the right way, avoiding costly mistakes? Contact Jax Sod today at (904) 901-1457 or visit jaxsod.com for a free estimate. Let our local experience work for you.
Need Professional Sod Installation?
Jax Sod provides sod installation, sod replacement, and new lawn installation across Jacksonville and Northeast Florida. Free quotes!
Related Articles
Amelia Island FL Sod Installation: Luxury Lawn Solutions
Professional sod installation services for Amelia Island properties. Expert tips for coastal lawns, salt-tolerant varieties, and luxury landscaping in Northeast Florida.
Bartram Park Jacksonville Sod Installation: Complete Guide for New Lawns
Everything you need to know about sod installation in Bartram Park. From soil prep to variety selection, learn how to establish a beautiful new lawn in Jacksonville's climate.

Clay County FL Sod Installation
Complete sod installation guide for Clay County, Florida. Expert advice for Orange Park, Fleming Island, Green Cove Springs, and surrounding areas.
Get Started
Ready for a New Lawn?
Get a free, no-obligation quote from Jax Sod for sod installation, sod replacement, or a new lawn in the Jacksonville area.
(904) 901-1457