How to Level Your Yard Before Sod Installation in Jacksonville
A level, properly graded yard is the foundation of a successful sod installation. While "level" doesn't mean perfectly flat—in fact, perfectly flat would be a serious mistake—it means smooth, free of bumps and depressions, with proper drainage away from structures. Getting this right before sod installation determines whether you'll have a beautiful, functional lawn or a problematic yard that puddles, scalps when mowing, and looks unprofessional.
At Jax Sod, we have seen how poor grading creates ongoing lawn problems across Jacksonville properties. From San Marco to Nocatee, from Riverside to Fruit Cove, we've worked with every type of terrain, soil condition, and drainage challenge that Northeast Florida presents.
The good news is that leveling and grading your Jacksonville yard before sod installation is a manageable DIY project for most homeowners who are physically capable and willing to invest the time. With the right approach, tools, and materials, you can create a proper grade that ensures years of lawn success.
In this comprehensive guide, we'll explain why leveling matters in Jacksonville's climate, how to identify problem areas in your yard, the tools and materials you'll need, step-by-step procedures for proper grading, addressing drainage issues, when professional help is needed, cost expectations, and dealing with settlement in Jacksonville's sandy soil.
Why Leveling and Grading Matter in Jacksonville
Proper yard leveling isn't purely aesthetic, though a smooth lawn certainly looks better than a lumpy one. In Jacksonville's climate and soil conditions, correct grading serves several critical functions that directly impact your lawn's health and usability.
Drainage Management
Jacksonville receives approximately 52 inches of rainfall annually, with much of it concentrated in summer months (June through September) when afternoon thunderstorms can drop 2 to 3 inches in a couple hours. This intense rainfall has nowhere to go except through or across your yard.
Without proper grading, water stands in low spots, creating areas that remain soggy for hours or even days after rain. Grass roots in these areas suffocate from lack of oxygen, the soil becomes anaerobic and smelly, and fungal diseases like brown patch thrive in the constantly wet conditions. These wet areas also become mud pits that are unusable and track into your home.
Conversely, proper grading channels water away from your lawn toward streets, swales, retention ponds, or rear property lines. The water moves across the surface without standing, the soil drains within an hour or two after rain, and the lawn remains functional and healthy.
The grading challenge is particularly important in Jacksonville because most residential properties have sandy soil that drains quickly vertically but provides no horizontal drainage assistance. Unlike clay soils that channel water laterally through drainage patterns, sand simply lets water percolate straight down or pool in depressions. Your surface grading has to do all the work of directing water flow.
Preventing Mower Scalping
An uneven yard creates mowing challenges that damage your grass. When you mow over a high spot, the mower deck follows the contour and cuts grass lower than your intended cutting height—sometimes removing all the grass blades and exposing soil. This "scalping" severely stresses the grass, creates brown patches, and provides opportunities for weed invasion.
In neighborhoods throughout Deerwood, Baymeadows, and Town Center where homeowners associations enforce lawn appearance standards, frequent scalping creates violations and fines. More importantly, repeatedly scalping the same high spots weakens grass to the point where it dies, creating permanent bare patches that require renovation.
Low spots create the opposite problem—the mower deck rides over depressions without cutting, leaving taller grass that stands out as green patches in an otherwise uniform lawn. You'll either accept an uneven appearance or go back over these areas separately, doubling your mowing time.
A properly leveled yard allows consistent mowing height across the entire lawn, promoting uniform appearance, healthier grass, and easier maintenance.
Aesthetic and Property Value
A smooth, uniform lawn simply looks more professional and attractive than a bumpy, uneven one. The difference in curb appeal is substantial, particularly for properties in upscale neighborhoods like Ponte Vedra, Nocatee, or established areas like Avondale and San Marco.
Beyond appearance, a well-maintained lawn with proper grading increases property value. Real estate professionals consistently note that lawn quality significantly impacts buyers' first impressions and perceived home value. An investment in proper grading before sod installation pays dividends if you ever sell your Jacksonville property.
Preventing Foundation Problems
Perhaps the most serious reason for proper grading is protecting your home's foundation. The soil around your foundation should slope away at a minimum 2% grade (some building codes specify 5% for the first 10 feet). This ensures rainwater flows away from the foundation rather than pooling against it.
Water pooling against foundations causes multiple problems: hydrostatic pressure that can crack foundation walls, water infiltration into basements or crawl spaces (less common in Jacksonville but possible), moisture problems that promote mold growth, and erosion of foundation support soil. In extreme cases, improper grading can lead to foundation settlement and structural damage costing tens of thousands to repair.
While Jacksonville's sandy soil provides better drainage than clay, reducing foundation risk somewhat, proper grading away from the house is still essential. This is particularly important in coastal areas like Jacksonville Beach, Atlantic Beach, and Neptune Beach where water tables are higher and soil saturation happens more readily.
How to Identify Low and High Spots in Your Yard
Before you can level your Jacksonville yard, you need to understand where the problems are. Some high and low spots are obvious—visible depressions where water stands, or mounds that are clearly elevated. Others are subtle and require careful observation to identify.
Visual Inspection After Rain
The simplest and most effective method for identifying drainage and leveling problems is walking your yard immediately after a heavy rain. Bring a notepad or use your phone to photograph problem areas.
Look for:
Standing water: Any area where water remains puddled 2 to 3 hours after rain ends is a low spot that needs filling.
Water flow patterns: Notice where water flows across your yard. Does it flow away from your house? Does it channel toward specific areas? Does it drain to the street, a swale, or a retention pond? Understanding natural drainage patterns helps you work with gravity rather than against it when establishing grades.
Saturated areas: Even if water isn't standing, notice areas where soil remains visibly saturated (dark, wet) long after other areas have drained. These are low spots or compacted areas that need attention.
Dry spots: Areas that dry very quickly despite rain are likely high spots where water runs off immediately rather than infiltrating.
Jacksonville's summer thunderstorm season (June through September) provides frequent opportunities for this observation. One thorough inspection after a 2-inch rainfall reveals more about your yard's drainage than hours of theoretical analysis.
String Level or Laser Level Method
For more precise identification of high and low spots, use a string level or laser level to check actual elevations across your yard.
String level method: Drive stakes at opposite edges of your yard and stretch a string between them, leveling it with a string level tool (available at hardware stores for $5-$10). Measure from the string to the ground at regular intervals—every 5 to 10 feet. Areas where the measurement is greater than average are low spots; areas where it's less are high spots.
This method works well for identifying subtle variations that aren't obvious visually. It's particularly useful for long, relatively straight sections of yard like the area between your house and the street.
Laser level method: A laser level (rentable or purchasable for $50-$200) projects a perfectly level beam. Set it up in the middle of your yard and use a measuring stick to check elevation relative to the laser beam at various points. This method is faster than string lines and works well for large or irregularly shaped areas.
The "Footprint Test"
Walk across your yard after a light rain or irrigation when the soil is moist but not saturated. Your footprints will be deeper in low spots where soil is softer from retained moisture, and shallower in high spots where soil drains and firms up quickly. This quick test helps identify subtle variations that might not be obvious otherwise.
Mowing Height Variations
If you already have grass (even if it's struggling and you plan to replace it), mow at your normal height and then observe the results. Areas that are scalped (cut too short, showing brown) are high spots. Areas where grass is still tall after mowing are low spots. This method obviously only works if you currently have grass, but it's useful for identifying problems before sod installation.
Jacksonville Pro Tip: In neighborhoods near St. Johns River or retention ponds (common in Nocatee, St. Johns County developments, and areas near waterways), check for high water table issues. Dig a hole 18-24 inches deep in a suspected problem area. If water seeps into the hole and remains after several hours, you may have a high water table that creates chronic drainage problems requiring more than simple grading to fix.
Tools and Materials Needed for Yard Leveling
Leveling a Jacksonville yard requires specific tools and materials. Most are rentable if you don't want to purchase them for a one-time project.
Essential Tools
Landscape rake: Also called a grading rake or leveling rake, this tool has a wide head (30-36 inches) with teeth on one side and a flat blade on the other. The flat side is perfect for leveling and smoothing. Essential for any grading project. Cost: $35-$60 to purchase, or $15-$25 per day to rent.
Flat shovel or spade: For removing excess soil from high spots and moving it to low spots. A flat blade works better than a pointed blade for this purpose. Cost: $20-$40.
Wheelbarrow or garden cart: For moving soil, especially if you're hauling fill material from a pile to various low spots across your yard. Cost: $60-$150 to purchase.
String line and stakes: For checking level across long distances and establishing reference lines for grading. Cost: $10-$20 for a quality string line kit.
String level or laser level: For establishing and checking level references. String level: $5-$10. Laser level: $50-$200 to purchase, or $25-$40 per day to rent.
Lawn roller: For firming and compacting fill material after placement and before sod installation. A half-full water roller is ideal (provides 150-200 lbs pressure). Cost: $25-$40 per day to rent.
Garden hose or sprinkler: For watering fill material to promote settling and compacting. You'll use your existing irrigation system or hoses.
Fill Materials for Jacksonville
The material you use to fill low spots and level your Jacksonville yard is critically important. The wrong material can create problems that persist for years.
Clean sand or sandy loam: This is the ideal fill material for Jacksonville properties. It matches the native soil composition, integrates well, and provides good drainage. Clean masonry sand or play sand works well for pure sand. Sandy loam (a mixture of sand and some organic matter) is even better because it provides slightly better nutrient retention while maintaining good drainage.
Source clean sand from landscaping supply companies in Jacksonville. Expect to pay $30-$50 per cubic yard (delivered in bulk) or $4-$7 for 50-lb bags at home improvement stores. For large areas needing significant fill, bulk delivery is far more economical.
Compost or composted manure: While not used as primary fill material, adding compost to sandy fill improves its quality. Mix 20-30% compost with 70-80% sand for an improved fill that levels your yard while enhancing soil quality. This is particularly valuable in Jacksonville's nutrient-poor native sand.
What NOT to use: Never use regular topsoil (unless it's specifically sandy loam topsoil suited to Jacksonville). Standard topsoil from other regions is often clay-heavy and drains poorly. When you create layers of different soil types, you create what soil scientists call an "interface" that disrupts water movement and can actually create drainage problems where none existed before.
Also avoid using subsoil, fill dirt from unknown sources (may contain debris or contamination), or organic materials like pure compost or peat moss as fill (they compress excessively as they decompose, creating new low spots).
How Much Fill Material Do You Need?
Calculating fill requirements prevents under-ordering (delays while you get more material) or over-ordering (waste and disposal costs).
Measure each low spot: length × width × depth (in feet). This gives you cubic feet. Divide by 27 to convert to cubic yards (the usual purchase unit for bulk material).
Example: A low spot measuring 10 feet × 15 feet × 0.5 feet deep = 75 cubic feet ÷ 27 = 2.8 cubic yards.
For multiple low spots, calculate each one and add them together. Add 10-20% extra for waste, compaction, and contingency. So for a calculated need of 2.8 cubic yards, order 3 to 3.5 cubic yards.
For large areas needing only slight leveling (just topdressing to smooth minor variations), calculate the entire area and estimate average depth needed. For example, a 2,000 square foot area needing an average 0.25 inches of material:
2,000 sq ft × (0.25 ÷ 12 feet) = 41.7 cubic feet ÷ 27 = 1.5 cubic yards.
Step-by-Step Yard Leveling Process
With tools and materials assembled, you're ready to level your Jacksonville yard. This process typically takes 1 to 3 days for an average residential property, depending on yard size and the extent of problems.
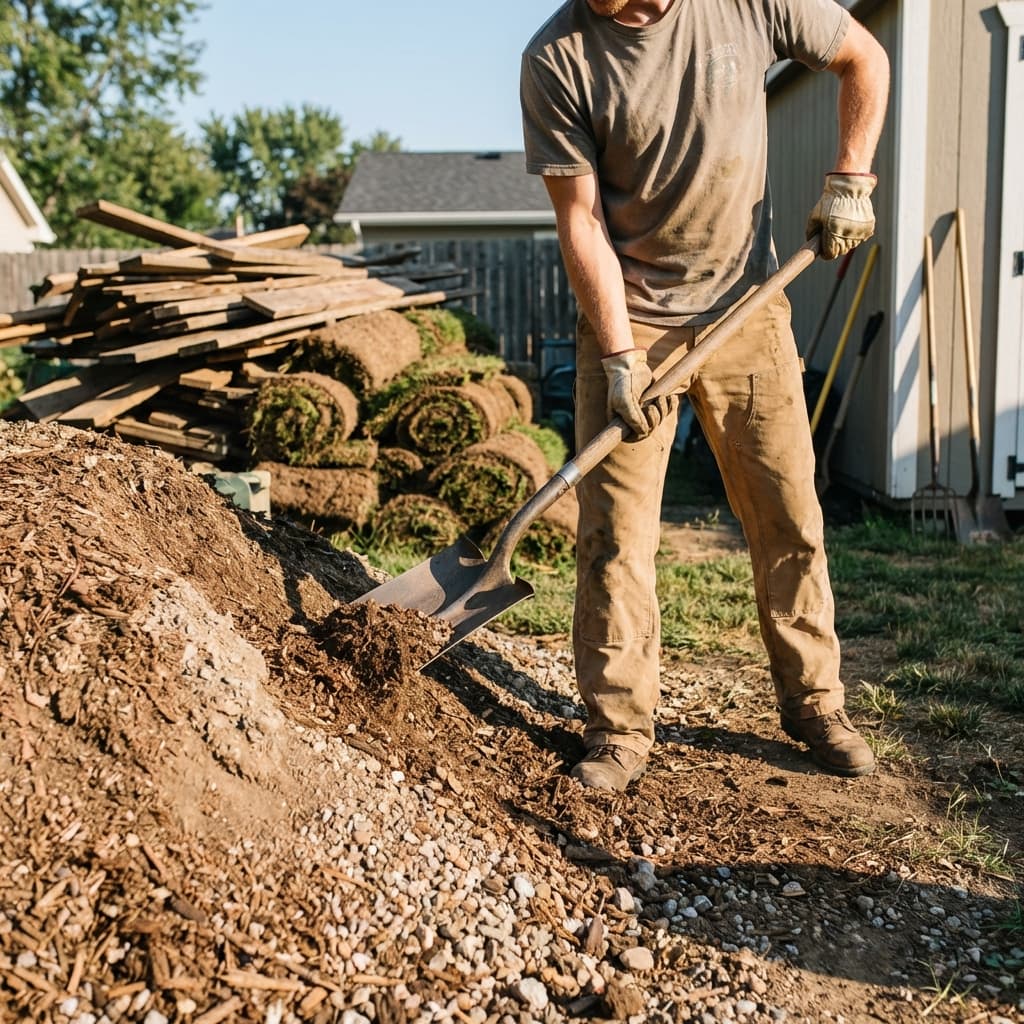
Step 1: Remove Existing Grass
If you're leveling before new sod installation, completely remove existing grass first. Use a sod cutter (rentable for $90-$150/day) for areas larger than 1,000 square feet, or herbicide followed by dead grass removal for smaller areas.
Removing grass allows you to work directly with the soil, see high and low spots clearly, and avoid creating problematic layering. Don't be tempted to "level over" existing grass—this creates future problems and prevents proper sod rooting.
Step 2: Address High Spots
Start with high spots because the soil you remove becomes fill for low spots, reducing the amount of purchased fill needed.
Mark all high spots with spray paint or stakes so you don't lose track of them once you start working. Use a flat shovel to remove excess soil, cutting away high areas to bring them down to target grade. Move removed soil directly to low spots or pile it nearby for use as fill.
Jacksonville's sandy soil makes this work easier than clay soils—the loose texture is easily shoveled and moved. However, be aware that sandy soil doesn't compact significantly, so what you see is approximately what you'll get. Remove enough material to actually eliminate the high spot, not just reduce it slightly.
Step 3: Fill Low Spots
With high spots eliminated, focus on filling depressions. If you removed soil from high spots, use that first before adding purchased fill material. Jacksonville's native sand from high spots is ideal fill for low spots on the same property.
Spread fill material into low spots, slightly overfilling because material will compact and settle. For depressions deeper than 4 inches, fill in layers—add 2-3 inches, compact it, water it, let it settle, then add the next layer. This approach prevents excessive settling after sod installation.
For shallow depressions (under 2 inches), you can fill in a single application. Spread fill slightly above the target grade, then compact with a roller or by walking over the area repeatedly.
Step 4: Establish Proper Drainage Grades
With major high and low spots addressed, focus on overall drainage patterns. The key principle is that water must flow away from your house and toward appropriate drainage points.
Foundation areas: For the first 10 feet adjacent to your house foundation, establish a 5% slope—5 feet of elevation drop per 100 feet of horizontal distance, or about 6 inches of drop over 10 feet. This aggressive slope ensures water moves quickly away from the foundation.
General yard areas: For the rest of your yard, establish a 2% slope—2 feet of drop per 100 feet, or about 2-3 inches over 10 feet. This is gradual enough to be imperceptible when walking or mowing but sufficient to move water effectively.
Drainage destination: Water needs somewhere to go. Most Jacksonville properties drain toward:
- The street (typical for front yards)
- A swale (common in developments with engineered drainage)
- A retention pond (standard in newer communities like Nocatee)
- The rear property line (for properties that back up to open space or waterways)
Verify that your grading directs water toward the appropriate destination. Use a string line or laser level to establish grade lines, then use your landscape rake to create smooth, even slopes following those lines.
Step 5: Smooth and Blend
After major grading is complete, use the flat side of your landscape rake to smooth the entire surface. The goal is eliminating all bumps, dips, clods, and variations. The surface should be uniformly smooth—you should be able to slide the rake across it in any direction without catching on irregularities.
Pay particular attention to transitions between filled areas and existing grade. These should be gradual and smooth, not abrupt. Blend filled low spots into surrounding areas so transitions are imperceptible.
Remove all debris during this process: rocks, roots, construction debris, clods of clay (if any), and organic debris. Anything that prevents smooth sod contact with soil needs to go.
Step 6: Compact and Settle the Soil
After smoothing, use a lawn roller half-filled with water to compact the graded soil. Make overlapping passes covering the entire yard. The roller firms the soil, reveals any remaining high or low spots (which you'll need to address), and creates a stable surface for sod.
Don't over-compact, especially Jacksonville's sandy soil. A half-full roller provides adequate pressure (150-200 lbs) to firm the surface without creating the compaction problems that restrict root growth and water infiltration.
Step 7: Water and Allow Settling
After rolling, water the entire graded area thoroughly. This promotes settling and reveals any areas that settle more than others (indicating insufficient compaction or problematic fill material).
Allow 24-48 hours for settling, then inspect again. Low spots that reappear need additional fill. High spots that become apparent need cutting down. Make these final adjustments, roll again, and water again.
For large projects or areas with significant fill, you might repeat this water-settle-adjust cycle 2 or 3 times over a week to ensure everything is stable before sod installation.
Step 8: Final Preparation for Sod
The prepared surface should be:
- Smooth: No bumps, depressions, or variations
- Firm: Supports your weight without sinking more than 0.5 inch
- Properly graded: Slopes away from foundations, flows toward drainage points
- Clean: Free of debris, rocks, and organic material
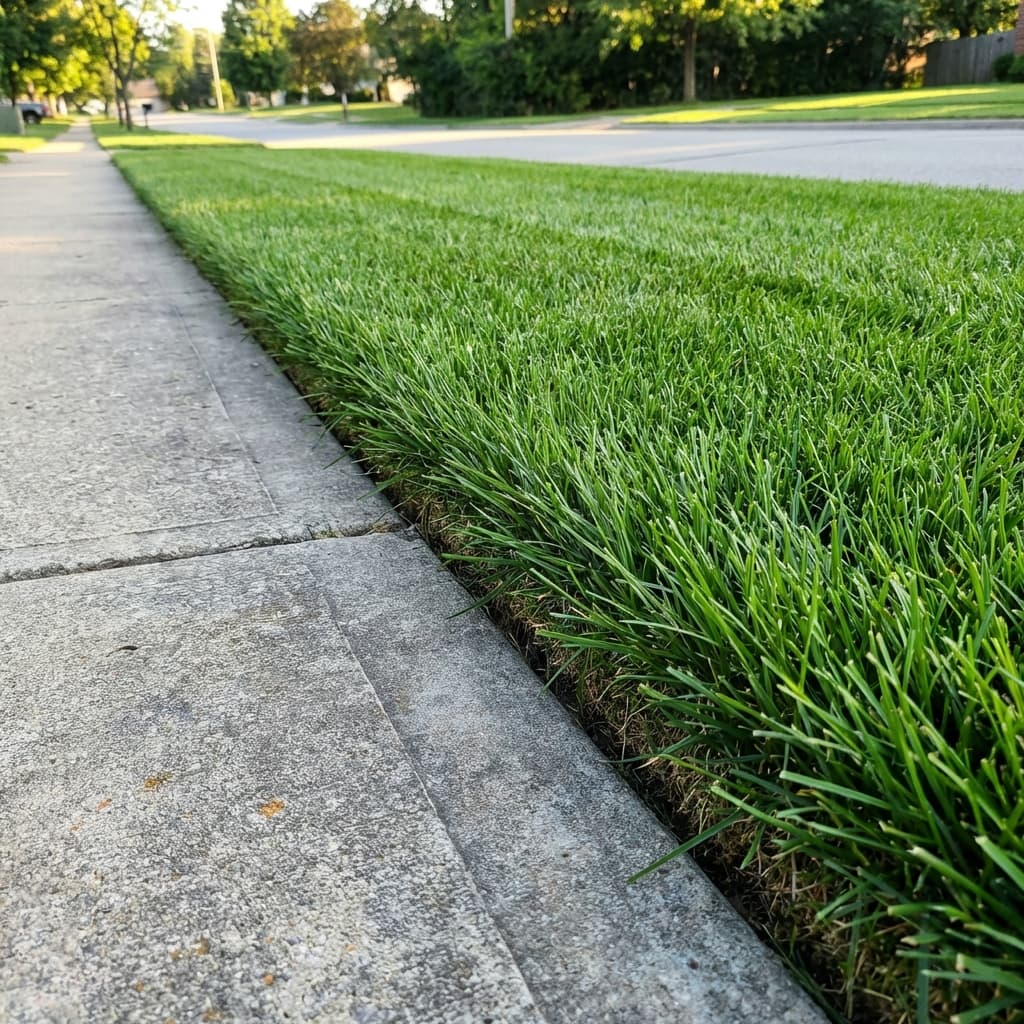
- Level with hardscapes: Soil surface should be 1 to 1.5 inches below adjacent sidewalks, driveways, or patios (accounting for sod thickness)
If your surface meets these criteria, you're ready for sod installation. If not, make additional adjustments until it does. Perfection at this stage prevents problems for years to come.
Jacksonville-Specific Fill Material Considerations
Jacksonville's sandy soil and Florida's climate create specific requirements for fill materials that differ from recommendations in other regions.
Why Clean Sand or Sandy Loam
Jacksonville's native soil is predominantly sand—often 90% or more sand particles. This soil drains very quickly but holds minimal nutrients and organic matter. When you add fill material to level your yard, that material should match or complement the native soil composition.
Clean sand integrates perfectly with Jacksonville's native sandy soil. Water moves through both materials at the same rate, preventing the "perched water table" effect that happens when layering materials with different drainage characteristics.
Sandy loam—a mixture of sand with 10-20% organic matter—is even better. It matches Jacksonville's sand drainage while adding some nutrient and water retention capacity. This creates a better growing medium for sod while maintaining consistent drainage.
Why NOT Regular Topsoil
"Topsoil" from other regions or general-purpose topsoil sold at garden centers is often loam or even clay-loam composition. This material drains much more slowly than sand. When you spread clay-based topsoil over sandy subsoil, you create a layered profile where water moves quickly through the sand, hits the clay layer, and stops or slows dramatically.
This creates several problems: Water perches at the interface, creating saturated conditions even though the soil below and above are relatively dry. Roots struggle to penetrate from one layer to another. The layers settle differently, potentially creating new unevenness. Sod roots may stay confined to the topsoil layer rather than penetrating deeply into native sand.
In Jacksonville's heavy summer rainfall, these interface problems cause chronic wet spots, fungal disease pressure, and struggling grass. Always use sand-based fill materials that match native soil characteristics.
Topdressing with Compost-Sand Mix
For minor leveling (filling shallow depressions under 1 inch or smoothing subtle variations), a topdressing approach works well. Mix quality compost or composted manure (30%) with clean sand (70%) and spread this mixture 0.25 to 1 inch thick over areas needing leveling.
This topdressing levels minor variations while simultaneously improving soil quality—adding organic matter, improving water retention, and providing nutrients. It's an excellent approach for properties with generally acceptable grades but minor unevenness.
For Jacksonville lawns, topdressing with compost-sand mix can be done even on existing grass (if you're not replacing it with sod). Spread the mix in a thin layer that doesn't bury grass completely, and the grass grows through it within a few weeks while the mix settles into the soil profile, creating a smoother surface.
Grading Away from Foundations
Proper grading near your house foundation deserves special attention because mistakes here can cause serious, expensive problems.
The Minimum Standard
Building codes and best practices require that soil slopes away from foundations at a minimum rate of 6 inches of fall over the first 10 feet. This is approximately a 5% slope—noticeable if you measure it but gradual enough that it doesn't appear steep when walking.
For Jacksonville properties, achieving this minimum standard is essential because our 52 inches of annual rainfall creates substantial water volume that must be directed away from structures. The combination of intense summer thunderstorms (sometimes 2-3 inches in an hour) and soil that doesn't channel water laterally makes surface grading the primary defense against foundation water problems.
Checking Current Grade
Before sod installation, verify your foundation grade. Stand at the foundation wall and look outward. The soil should visibly slope downward away from the house. If it appears flat or, worse, slopes toward the house, you have a significant problem to correct.
For precise measurement, use a laser level or string level. Mark a point on the foundation (or at the foundation soil line) and another point 10 feet away. The point 10 feet away should be at least 6 inches lower. If it's not, you need to add fill near the foundation, remove soil at the 10-foot point, or both.
Correcting Negative Grades
If your Jacksonville property slopes toward the house—called "negative grade"—correcting it is essential before sod installation. This condition is surprisingly common on new construction (builders don't always get final grading right) and older properties (soil settles over decades, creating depressions near foundations).
To correct negative grade:
-
Add fill at the foundation: Build up soil level at the foundation wall. Use clean sand or sandy loam, creating a slope away from the house. The soil level near the foundation should be at least 2 inches below siding, brick, or stucco to prevent moisture wicking into wall materials.
-
Create transition slope: Extend the elevated foundation area outward 8-10 feet with gradually decreasing fill thickness, creating a smooth slope to the normal yard grade.
-
Ensure drainage path: Verify that water flowing away from the foundation has somewhere to go—toward the street, swale, or rear property line. Don't create a slope away from the foundation only to have water collect in a low spot 15 feet away.
-
Compact thoroughly: Foundation area fill must be well-compacted to prevent settling. Fill in layers (2-3 inches at a time), compacting and watering each layer before adding the next.
This work is physically demanding and critically important. If your Jacksonville property has significant negative grade issues, professional grading services may be worth the investment to ensure it's done correctly.
When Professional Grading Is Needed
While many Jacksonville homeowners can successfully level their yards for sod installation, some situations require professional help.
Severe Drainage Problems
If your property has chronic standing water, water that drains toward your house, or soggy areas that never dry, surface grading alone may be insufficient. These problems might indicate:
- High water table (common near St. Johns River, retention ponds, or in coastal areas)
- Compacted clay subsoil preventing vertical drainage (more common in Clay County than Duval)
- Inadequate or blocked drainage infrastructure (clogged swales, failed French drains)
- Neighboring property grading issues that direct water onto your property
Professional assessment can identify root causes and design solutions that might include French drains, catch basins, soil excavation and replacement, or even grading changes that require earth-moving equipment.
Large Properties or Major Grade Changes
For properties larger than half an acre, or situations requiring moving many cubic yards of soil, professional grading makes sense. Grading contractors have equipment—skid steers, bulldozers, laser-guided scrapers—that completes in hours what would take you days or weeks with hand tools.
If your Jacksonville property needs more than 6 inches of fill in large areas, more than 10 cubic yards of material moved, or significant slopes created, get professional quotes. The efficiency of professional equipment often makes the cost comparable to DIY once you factor in tool rental, material delivery, and your time.
Properties with Septic Systems or Utilities
If your property has a septic system, underground utilities, irrigation lines, or invisible dog fences, grading work requires knowing where these features are located. Accidentally damaging utilities or disrupting septic drainage can create expensive problems.
Professionals use utility location services (call 811 for free utility marking) and know how to work around underground features without damage. For Jacksonville properties with septic systems (common in rural Nassau and Clay Counties), professional grading ensures septic drain field areas aren't compromised.
Properties with Accessibility Issues
Some properties have access challenges that make DIY grading impractical: narrow side yards, steep slopes, mature trees preventing equipment access, or soil that needs significant removal from the property. Professional contractors have equipment and material removal capabilities that overcome these challenges.
Cost Expectations for Yard Leveling in Jacksonville
Understanding cost helps you budget appropriately and decide between DIY and professional grading.
DIY Costs
For a typical Jacksonville residential yard (2,500-3,000 square feet) with moderate leveling needs:
- Sand/sandy loam fill material: 3-5 cubic yards at $30-$50/yard = $90-$250
- Compost for amendment: 1-2 cubic yards at $35-$50/yard = $35-$100
- Tool rentals: Sod cutter ($120), lawn roller ($30) = $150
- String line and hand tools: $50 (if you don't already own them)
- Total DIY cost: $325-$550
This assumes you have basic tools (shovel, rake) and don't need a wheelbarrow or major equipment. For smaller yards or minor leveling, costs could be 30-40% lower. For larger properties or extensive problems, costs could double.
Professional Costs
Professional grading services in Jacksonville typically charge by the square foot, by the hour, or with project quotes based on assessment.
- Minor leveling/smoothing: $0.50-$1.00 per square foot
- Moderate grading with fill: $1.00-$2.00 per square foot
- Extensive grading/drainage work: $2.00-$4.00 per square foot or hourly rates at $75-$125/hour
For that 2,500 square foot yard:
- Minor work: $1,250-$2,500
- Moderate work: $2,500-$5,000
- Extensive work: $5,000-$10,000
These prices typically include labor, equipment, basic materials (not always premium soil amendments), and disposal of excess material. High-end landscaping companies in areas like Ponte Vedra or Nocatee may charge 20-30% more than these ranges.
Value Comparison
DIY grading saves money—typically 50-70% compared to professional services—but requires physical labor, time (often 2-3 full days), tool rental and operation, and assumes you'll achieve proper results. For homeowners who are physically capable, have time, and are willing to learn, DIY makes sense.
Professional grading costs more but ensures correct results (grading contractors do this daily), completes quickly (typically 1 day), includes equipment you'd otherwise rent, and often includes warranty or guarantee of results.
At Jax Sod, we often recommend professional grading for significant problems and DIY for minor leveling. Many homeowners choose a hybrid approach: hire professionals for major grading and drainage issues, then do final smoothing and touch-up work themselves before sod installation.
Settling Issues in Jacksonville's Sandy Soil
Jacksonville's sandy soil settles differently than heavier soils, creating specific considerations for yard leveling projects.
Why Sandy Soil Settles
Sand particles are relatively large (compared to clay or silt) and have minimal cohesion—they don't stick together. When you add sandy fill material, the particles initially have air spaces between them. As water infiltrates and gravity works, particles shift into more compact arrangements, reducing the total volume.
The good news is that sandy soil settles relatively quickly—most settling occurs within days to weeks rather than months. The bad news is that settling is inevitable, so you must account for it in your leveling work.
Minimizing Settling Problems
To minimize problematic settling after sod installation:
Compact fill material: Use a roller or foot traffic to compact sandy fill before sod installation. This eliminates large air voids and forces particles into compact arrangements. Well-compacted sand settles minimally after installation.
Water and wait: After filling and compacting, thoroughly water the graded area and wait 24-48 hours. This accelerates settling. Any areas that settle noticeably need additional fill before sod installation.
Overfill slightly: When filling low spots, add fill slightly above target grade—perhaps 0.25 to 0.5 inches over. This compensates for the settling that will occur even with compaction and watering.
Fill in layers: For depressions deeper than 4 inches, fill in 2-3 inch layers rather than all at once. Compact and water each layer before adding the next. This creates more stable fill that settles less.
Use appropriate materials: Pure sand settles more than sandy loam with some organic matter. The organic matter provides cohesion that stabilizes the fill. A 70/30 sand/compost mix settles less than pure sand while maintaining good drainage.
Post-Installation Settling
Despite best efforts, some settling may occur after sod installation, particularly in areas that required significant fill. If settling creates noticeable depressions in your new lawn:
Wait for establishment: Allow the sod to fully root (typically 3-4 weeks) before addressing settling. Working on turf before it's fully rooted can damage it.
Topdress low areas: Mix sand (or sand/compost blend) and spread it over settled areas at 0.25 to 0.5 inches thick. Work it into the grass with a rake so it settles to soil level. The grass grows through this topdressing within a few weeks.
Repeat as needed: You may need to topdress 2 or 3 times over several months to completely fill a settled area. Gradual filling is better than dumping thick layers that bury grass.
Prevent future settling: If an area repeatedly settles, the underlying fill may not have been properly compacted. You may need to remove sod, excavate poorly compacted fill, replace it with properly compacted material, and reinstall sod.
Ready to Level Your Yard and Install Beautiful Sod?
Leveling and grading your Jacksonville yard before sod installation is essential for drainage, appearance, lawn health, and long-term success. While it's labor-intensive work, it's manageable for most homeowners and makes the difference between a lawn you love and one that disappoints.
At Jax Sod, we provide both complete installation services (including professional grading) and delivery-only options for DIY installers who want to do their own preparation and installation. Our years serving Northeast Florida have taught us exactly what Jacksonville's sandy soil, intense rainfall, and climate require for successful sod establishment.
If you choose full-service installation, our team handles everything: old grass removal, soil testing, grading and drainage correction, soil amendment, professional sod installation using premium grass varieties, and post-installation care instructions. We ensure your property is properly graded with correct drainage before a single piece of sod is laid.
If you prefer DIY installation, we provide consultation on grading and preparation, delivery of quality sod freshly cut to order, and expert advice on installation techniques. We're happy to answer questions and help you avoid common mistakes.
We serve all of Duval, Clay, St. Johns, and Nassau Counties, carrying premium grass varieties suited to Jacksonville's climate: St. Augustine varieties (Palmetto, CitraBlue, Floratam, Seville), Bermuda varieties (TifTuf, Celebration, Tifway 419), zoysia varieties (Empire, Zeon, Palisades), and bahia grass.
Ready to level your yard and install beautiful sod? Contact Jax Sod today at (904) 901-1457 or visit jaxsod.com for a free estimate. Let our local experience work for you.
Need Professional Sod Installation?
Jax Sod provides sod installation, sod replacement, and new lawn installation across Jacksonville and Northeast Florida. Free quotes!
Related Articles
10 Sod Installation Mistakes to Avoid in Jacksonville
Avoid costly sod installation mistakes in Jacksonville. Learn the top 10 errors homeowners make and how to install your lawn correctly the first time.
Amelia Island FL Sod Installation: Luxury Lawn Solutions
Professional sod installation services for Amelia Island properties. Expert tips for coastal lawns, salt-tolerant varieties, and luxury landscaping in Northeast Florida.
Bartram Park Jacksonville Sod Installation: Complete Guide for New Lawns
Everything you need to know about sod installation in Bartram Park. From soil prep to variety selection, learn how to establish a beautiful new lawn in Jacksonville's climate.
Get Started
Ready for a New Lawn?
Get a free, no-obligation quote from Jax Sod for sod installation, sod replacement, or a new lawn in the Jacksonville area.
(904) 901-1457