How to Care for New Sod in Jacksonville, FL: First 30 Days Guide
You just had new sod installed — congratulations! Whether you tackled it yourself or had the team at Jax Sod handle the installation, the next 30 days are the most critical period in your new lawn's life. What you do right now determines whether you end up with a thick, beautiful yard or a patchy mess that costs you time and money to fix.
As Jacksonville landscaping professionals who've installed thousands of lawns across Duval, St. Johns, Clay, and Nassau counties, we've seen every mistake in the book. We've also seen homeowners follow a simple plan and end up with a lawn that's the envy of their neighborhood within weeks.
This guide gives you that plan — day by day, week by week — tailored specifically for Jacksonville's climate, soil, and the St. Augustine and Zoysia grass varieties that thrive here in Northeast Florida.
The Golden Rule: Water Is Everything in the First Two Weeks
Before we get into the daily schedule, understand this: your new sod has no root system connecting it to the soil beneath it. Those pallets of grass were cut from a farm, and right now each piece is surviving entirely on the moisture you provide. In Jacksonville's heat — especially during our brutal summers — sod can dry out and die in a matter of hours if neglected.
The flip side is also true. Overwatering is the second most common killer of new sod in Jacksonville, right behind underwatering. Waterlogged soil suffocates developing roots and invites fungal disease, which spreads fast in our humid climate.
The goal is simple: keep the soil consistently moist — not soaked, not dry — while the roots establish.
Days 1–3: Saturation Phase
Day 1 (Installation Day)
Watering should begin within 30 minutes of installation — ideally as each section is laid, not after the entire yard is complete. On a hot Jacksonville summer day, sod that sits unwatered for even an hour can start curling at the edges.
- How much: Water until the soil beneath the sod is wet to a depth of 3–4 inches. Lift a corner of a piece to check — the soil underneath should be dark and moist, not just damp on the surface.
- How long: This typically takes 30–45 minutes per irrigation zone, depending on your sprinkler system's output.
- When: Start immediately. If sod was installed in the morning, water again in the late afternoon if edges are curling or the ground feels dry when you lift a corner.
Day 2
- Water twice: Once in the early morning (5:00–7:00 AM) and once in the early afternoon (1:00–3:00 PM).
- Duration: 20–30 minutes per zone each session.
- Check: Lift corners in multiple spots. The soil should be moist but you shouldn't see standing water or puddles that linger for more than a few minutes.
Day 3
- Water twice: Same schedule as Day 2.
- Watch for: Low spots where water pools. If you see standing water that doesn't drain within 15–20 minutes, reduce watering time for that zone. Puddles are a red flag — they breed fungus and drown roots before they even start.
Jacksonville Pro Tip: If your sod was installed during the summer months (May–September), you may need a third midday watering during Days 1–3 if temperatures exceed 95°F. Watch for the grass blades folding in half lengthwise or taking on a blue-gray color — both are signs of heat stress and dehydration.
Days 4–7: Establishing Moisture Consistency
By Day 4, you should transition from crisis-mode saturation to a consistent daily watering routine. The roots are beginning to reach into the soil, but they're fragile.
- Water once daily, early morning (before 8:00 AM to comply with St. Johns River Water Management District guidelines and minimize evaporation).
- Duration: 30–40 minutes per zone, aiming to wet the soil 2–3 inches deep.
- Frequency adjustment: If afternoon temperatures exceed 90°F and you notice wilting or curling, add a brief 10–15 minute afternoon watering. But the morning watering is the priority.
- Stay off the grass: This means everyone — kids, dogs, you. Every footstep on new sod disrupts the fragile root-to-soil contact. If you must walk on it to adjust sprinkler heads, use a plywood board to distribute your weight.
What to Look For (Days 4–7)
- Good signs: Grass blades standing upright, consistent green color, no visible gaps between pieces expanding.
- Warning signs: Yellowing edges on individual pieces (underwatered or poor soil contact), sod pieces sliding when touched (overwatered), brown or gray patches (severe dehydration or fungus).
If you see individual pieces dying while others look healthy, the issue is usually uneven sprinkler coverage. Walk your yard while the sprinklers are running and note any dry spots your system misses. Hand-water those areas.
Days 8–14: Encouraging Root Growth
This is the transition week. Your sod should be starting to knit into the soil, and you can begin gradually reducing water to encourage the roots to grow deeper.
- Water every other day (or every day if summer temperatures are consistently above 90°F).
- Duration: 30–40 minutes per zone.
- Goal: Keep the top 3 inches of soil moist, but allow the very surface to dry slightly between waterings. This "dry-down" signals the roots to push deeper in search of moisture — exactly what you want.
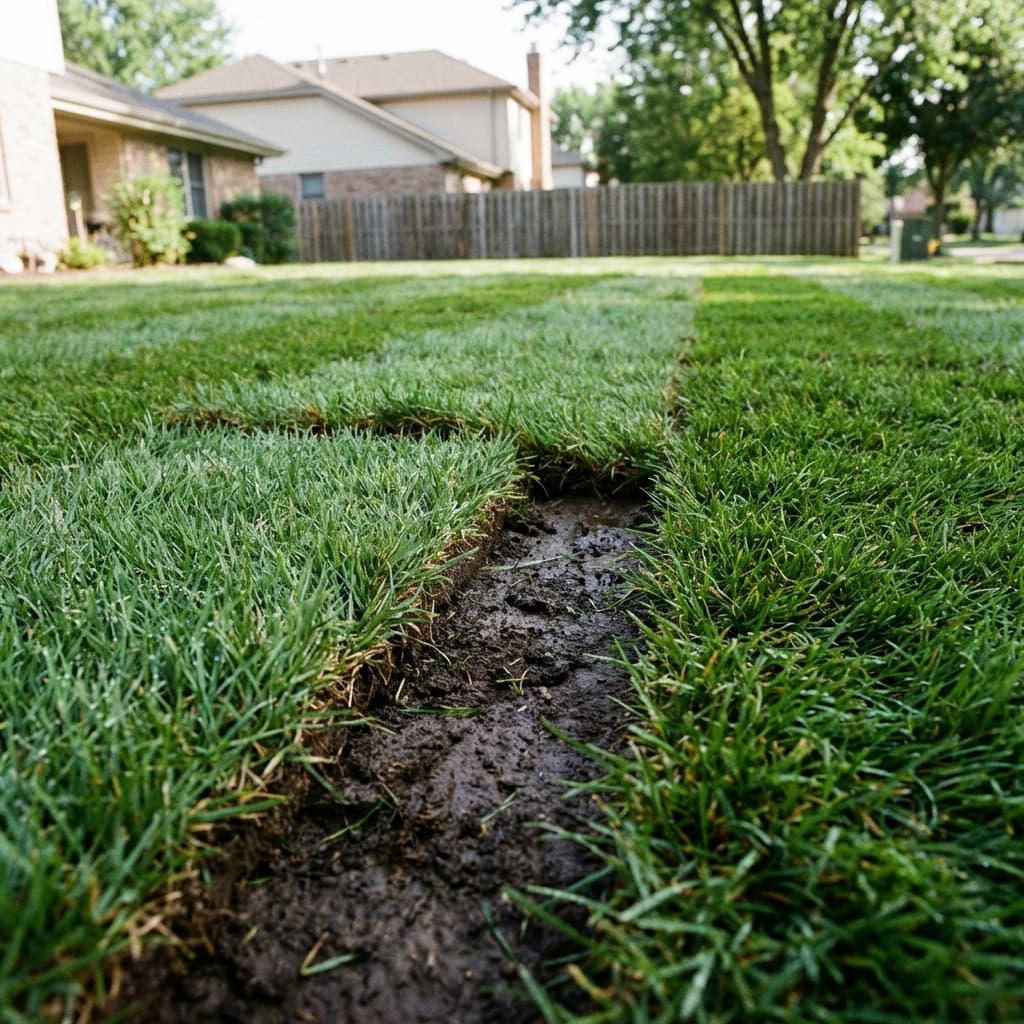
The Tug Test (Day 10–14)
Starting around Day 10, gently tug on a corner of a sod piece. If you feel resistance, roots are anchoring into the soil. If the piece lifts easily with no resistance, roots haven't established — continue daily watering and check again in a few days.
Don't yank hard or pull up the entire piece. A gentle tug at the edge is all you need. Test in several spots around the yard since shaded areas and full-sun areas root at different rates.
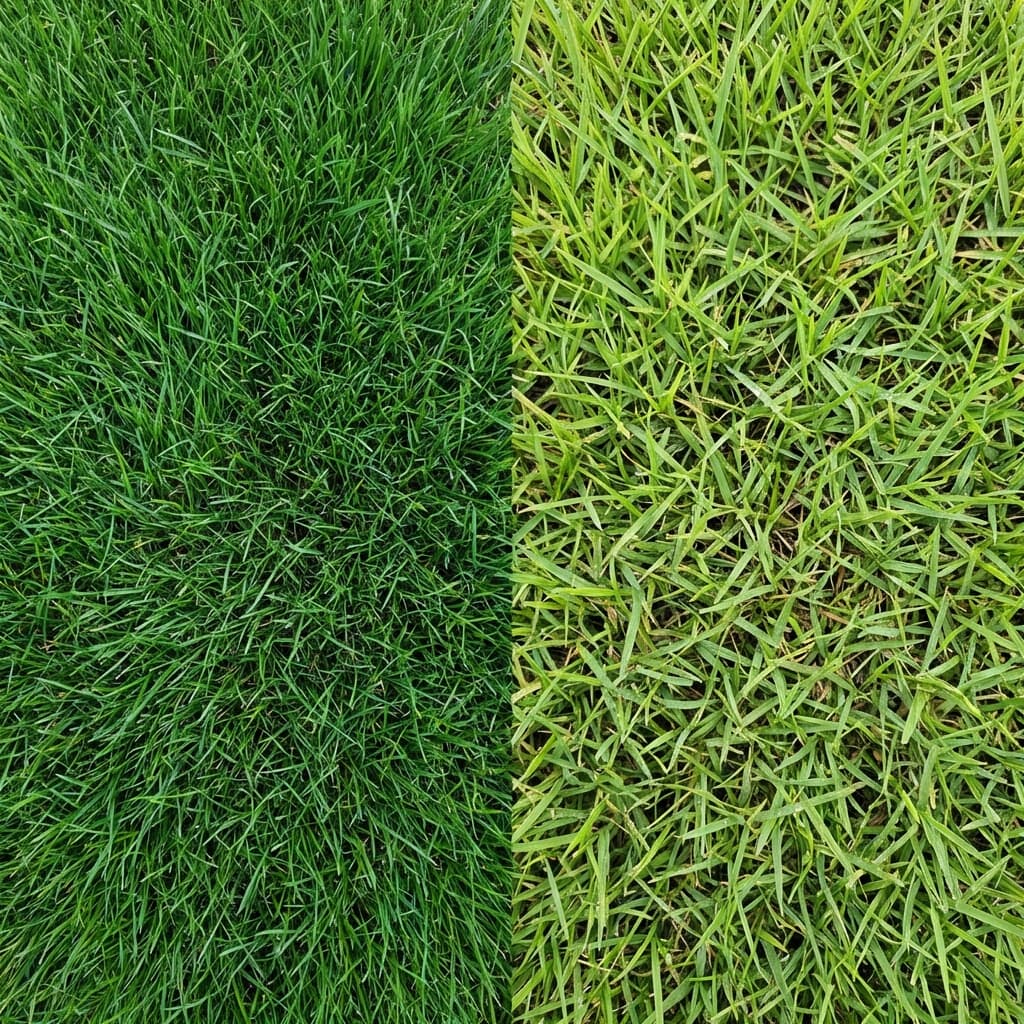
Note: St. Augustine grass (the most common variety we install in Jacksonville) typically shows good root establishment in 10–14 days during warm months. Zoysia may take slightly longer — up to 21 days. During cooler months (November–February), expect establishment to take 3–4 weeks for either variety.
Weeks 3–4: Transitioning to a Normal Lawn
If the tug test shows solid resistance across most of your yard, congratulations — your sod is establishing. Now it's time to start transitioning to a normal lawn care routine.
Watering (Weeks 3–4)
- Reduce to 2–3 times per week.
- Water deeply: 30–45 minutes per zone, wetting the soil 4–6 inches deep. You're now training the roots to grow deep, which makes your lawn drought-tolerant long-term.
- Best days: Water on your assigned St. Johns River Water Management District watering days. Jacksonville addresses typically have designated irrigation days — check your schedule at sjrwmd.com if you're unsure.
By the end of Week 4, you should be on a standard Jacksonville watering schedule: 2 days per week during spring/fall, up to 3 during peak summer if needed, and once per week or less during winter.
When to Mow New Sod for the First Time
This is where homeowners get anxious — and where many make their first big mistake. Do not mow your new sod until it has fully rooted, which means it passes the tug test with firm resistance across the entire yard.
General Timeline
- Summer installations: First mow typically around Day 14–21
- Winter installations: First mow around Day 21–30 (or even later — there's no rush if the grass isn't actively growing)
First Mow Rules
- Mow high: Set your mower to its highest setting (typically 4 inches for St. Augustine). Never remove more than one-third of the blade height in a single mowing.
- Sharp blades only: Dull mower blades tear grass instead of cutting it, which stresses new sod and invites disease. If you haven't sharpened your blades recently, do it before the first mow.
- Mow when dry: Wait until the grass and soil surface are dry. Mowing wet new sod can pull up pieces that aren't fully rooted and leave ruts from mower wheels.
- Bag clippings the first time: For the very first mow, bag your clippings to avoid smothering the still-establishing grass. After that, mulching is fine and actually beneficial.
When to Fertilize New Sod
Do not fertilize new sod for at least 30–60 days after installation. This is one of the most common mistakes we see Jacksonville homeowners make. They want to "help" the grass, but fertilizing too early can chemically burn tender new roots and cause more harm than good.
Fertilization Timeline
- Days 1–30: No fertilizer. Period. The sod was fertilized at the farm before harvest.
- Days 30–60: You can apply a starter fertilizer with a high phosphorus content (look for a middle number like 16-16-16 or similar) to encourage root development. Apply at half the bag rate.
- Day 60+: Transition to a standard Jacksonville lawn fertilization schedule. In Duval County, we recommend fertilizing St. Augustine 3–4 times per year: March, May, September, and optionally November with a winterizer blend.
Local Note: Duval County has a fertilizer blackout period from June 1 through September 30 — you cannot legally apply nitrogen or phosphorus fertilizers during hurricane season. Plan your fertilization schedule accordingly. If your sod is installed during summer, the first fertilizer application may need to wait until October.
Signs of Stress: What to Watch For
Learning to read your new lawn is crucial during the first 30 days. Here's what different symptoms typically mean in Jacksonville:
Yellowing Grass
- Possible cause: Overwatering, poor drainage, or iron deficiency (common in Jacksonville's sandy and sometimes alkaline soil).
- Fix: Reduce watering frequency. If yellowing persists after adjusting water, an iron supplement (chelated iron) can be applied safely even on new sod.
Brown or Crispy Edges on Sod Pieces
- Possible cause: Insufficient watering, especially where pieces meet. Edges dry out fastest.
- Fix: Increase watering duration or add a supplemental hand-watering session focused on seams and edges.
Blue-Gray Color / Folded Blades
- Possible cause: Drought stress. The grass is conserving water by folding its blades to reduce sun exposure.
- Fix: Water immediately and deeply. This is urgent in Jacksonville summers — if you see this in the afternoon, don't wait until the next morning.
Sod Pieces Shrinking with Gaps Between Them
- Possible cause: Dehydration. The sod is literally drying out and contracting.
- Fix: Increase watering immediately. Fill gaps with sand or topsoil to prevent them from becoming permanent. This is common in summer installations that are under-watered during the first week.
Spongy or Mushy Feel Underfoot
- Possible cause: Overwatering or poor drainage.
- Fix: Skip a watering day and check drainage. Jacksonville has areas with high water tables and clay subsoil (especially in the Westside and Mandarin areas) where drainage can be an issue.
Circular Brown Patches (Fungus)
- Possible cause: Fungal disease, usually Brown Patch or Large Patch, both extremely common in Jacksonville's humid climate.
- Fix: Apply a fungicide labeled for your grass type. Reduce watering frequency and avoid evening watering, which leaves grass wet overnight and promotes fungal growth.
The 5 Most Common Mistakes Jacksonville Homeowners Make with New Sod
1. Overwatering
More new sod dies from overwatering than underwatering in Jacksonville. Our instinct is to keep watering "just in case," but waterlogged soil kills roots and breeds fungus. Follow the schedule above and trust the process.
2. Mowing Too Soon
We get it — the grass is getting long and it's driving you crazy. But mowing before the sod is rooted can literally pull pieces up off the ground. Be patient. Two to three weeks won't make or break your lawn's appearance, but mowing too early can destroy weeks of establishment.
3. Walking on New Sod
Every footprint compresses the soil unevenly and disrupts root-to-soil contact. Keep pets, kids, and foot traffic off the new sod for a minimum of two weeks — three weeks during cooler months. This includes not dragging hoses across the lawn. Set up your sprinkler placement before installation day if possible.
4. Fertilizing Too Early
The impulse to "feed" your new lawn is understandable but counterproductive. The sod has nutrients from the farm. Adding more, especially nitrogen, during the first month can burn the developing root system and cause rapid top growth at the expense of root development.
5. Ignoring Sprinkler Coverage
Your irrigation system was probably set up for your old lawn — or it may have heads that are clogged, misaligned, or providing uneven coverage. Walk your entire yard during an irrigation cycle in the first few days. Every dead patch on a new lawn that we diagnose in Jacksonville traces back to a sprinkler coverage gap at least half the time.
Seasonal Adjustments: Summer vs. Winter Sod Installation in Jacksonville
Jacksonville's climate creates dramatically different conditions for new sod depending on when it's installed. Here's how to adjust your care routine:
Summer Installation (May–September)
- Watering: You'll likely need to water more aggressively — twice daily for the first week is often necessary, sometimes three times during extreme heat.
- Time of day: Early morning is ideal, but afternoon supplemental watering is almost always needed. Avoid watering in the evening if possible — Jacksonville's summer humidity combined with overnight moisture is a recipe for fungal disease.
- Root establishment: Faster. Warm soil temperatures (Jacksonville's soil stays above 70°F all summer) promote rapid root growth. Expect rooting in 10–14 days.
- Mowing: You'll need to mow sooner because the grass is actively growing. First mow is typically around Day 14–18.
- Risk factors: Heat stress, dehydration, chinch bugs (a major St. Augustine pest in Jacksonville that's most active June–August), and fungal disease.
Winter Installation (November–February)
- Watering: Less frequent. Once daily for the first week is usually sufficient since evaporation rates are much lower. You may need to water only every 2–3 days after the first week.
- Root establishment: Slower. Soil temperatures drop into the 50s and 60s, and grass is semi-dormant. Expect rooting to take 21–30 days or more.
- Mowing: No rush. The grass is barely growing during Jacksonville winters. Your first mow may not be needed until spring.
- Frost: Jacksonville gets occasional frost events (typically December–February). New sod handles frost fine — don't water the night before a predicted frost, as wet soil + freezing temps can damage roots. Wait until mid-morning to water after a frost event.
- Risk factors: Root rot from overwatering (since grass isn't actively using water), slow establishment, and cold snaps. The main advantage of winter installation is dramatically lower water usage and less heat stress.
Our recommendation: If you have a choice, early fall (October–November) and early spring (March–April) are the ideal times to install sod in Jacksonville. You get warm enough soil for good root growth without the extreme heat stress of summer or the dormancy of winter. But we install sod year-round, and with proper care, it establishes beautifully in any season.
How to Know Your Sod Has Fully Rooted
You'll know your new lawn is fully established when:
- The tug test shows firm, uniform resistance across all areas of the yard — sun and shade, edges and center.
- The grass has a consistent color with no visible seams between pieces.
- You can mow without pieces shifting or lifting.
- New growth is visible — you'll see fresh, lighter-green blades emerging from the established sod.
- The lawn handles foot traffic without visible damage or displacement.
For most Jacksonville installations, full establishment takes 2–3 weeks in summer and 4–6 weeks in winter. Shaded areas and edges along hardscaping (driveways, sidewalks) always take the longest.
Your 30-Day New Sod Care Checklist
| Timeframe | Watering | Mowing | Fertilizer | Foot Traffic | |-----------|----------|--------|------------|--------------| | Days 1–3 | 2–3x daily, deep soak | No | No | None | | Days 4–7 | 1x daily (AM), supplement PM if hot | No | No | Minimal (plywood only) | | Days 8–14 | Every other day (daily if 90°F+) | No (tug test at Day 10) | No | Very limited | | Weeks 3–4 | 2–3x per week, deep watering | First mow when rooted (high setting) | Starter fertilizer OK after Day 30 | Light traffic OK |
Need Help? We're Here for You
At Jax Sod, we don't just deliver and install sod — we make sure it thrives. If you're seeing signs of stress, have questions about your watering schedule, or your sprinkler system isn't providing even coverage, give us a call. We offer post-installation lawn consultations for customers throughout Jacksonville, Ponte Vedra, Orange Park, Fleming Island, and the surrounding areas.
Whether you need fresh sod for a new installation, help troubleshooting an existing lawn, or advice on the best grass variety for your specific property, our team has the local expertise to get your Jacksonville lawn looking its best.
Your new sod is an investment — treat these first 30 days right, and you'll enjoy a beautiful lawn for years to come.
Need Professional Sod Installation?
Jax Sod provides sod installation, sod replacement, and new lawn installation across Jacksonville and Northeast Florida. Free quotes!
Related Articles
New Construction Sod Installation in Jacksonville
Complete guide to sod installation for new construction homes in Jacksonville. Learn timing, soil prep, grass selection, and avoiding builder-grade sod issues.
Sod Installation for New Construction Homes in Jacksonville
Just built a new home? Here's what you need to know about sodding your new construction lot--timing, builder coordination, and common pitfalls to avoid.
Bartram Park Jacksonville Sod Installation: Complete Guide for New Lawns
Everything you need to know about sod installation in Bartram Park. From soil prep to variety selection, learn how to establish a beautiful new lawn in Jacksonville's climate.
Get Started
Ready for a New Lawn?
Get a free, no-obligation quote from Jax Sod for sod installation, sod replacement, or a new lawn in the Jacksonville area.
(904) 901-1457