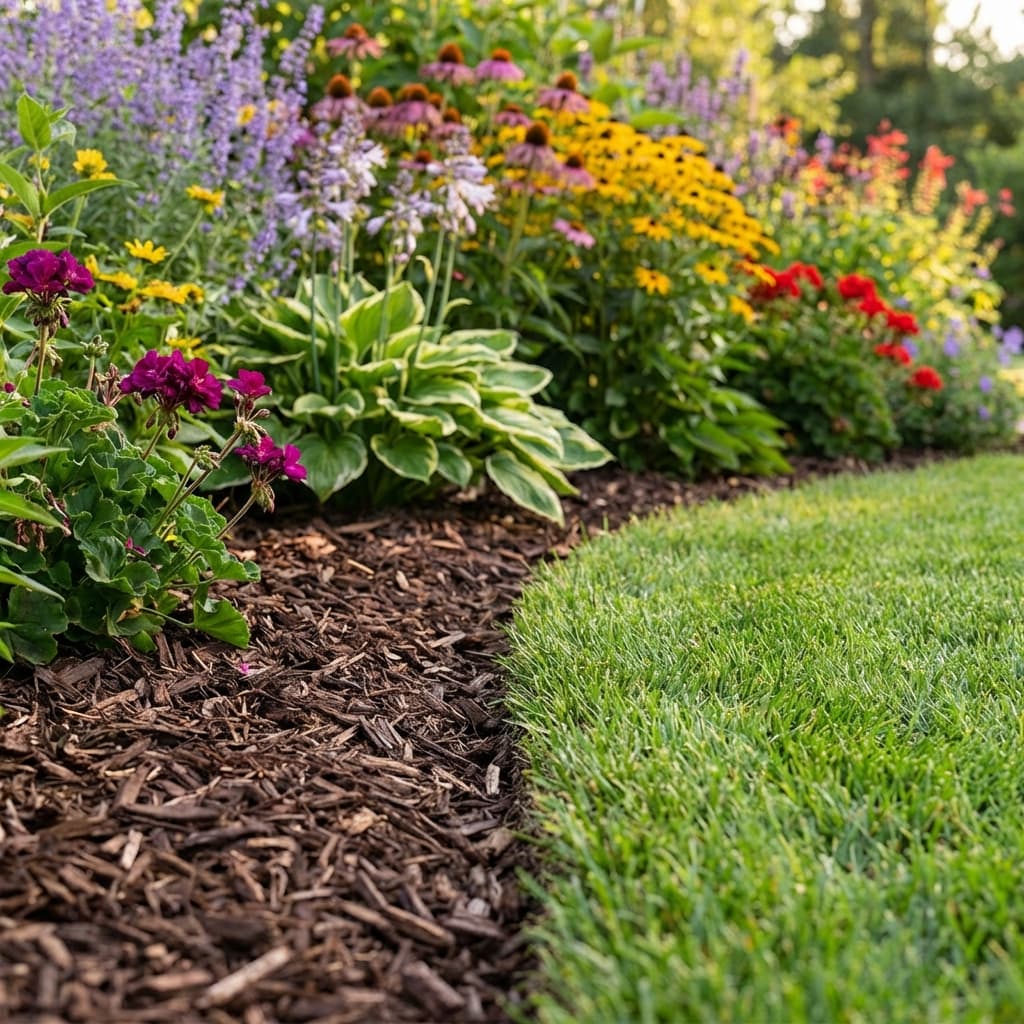
Walk through any well-maintained neighborhood in Jacksonville—Riverside, Avondale, Nocatee, Ponte Vedra—and you'll notice one thing the best-looking landscapes have in common: fresh, properly applied mulch in their garden beds.
Mulch isn't just decorative (though it definitely improves curb appeal). In Jacksonville's hot, humid climate with sandy soil, mulch is essential for plant health. It conserves moisture, moderates soil temperature, suppresses weeds, and gradually adds organic matter as it breaks down.
I've mulched hundreds of garden beds across Jacksonville, from small foundation plantings in Murray Hill to sprawling landscape designs in Deerwood. Done right, mulching is straightforward. Done wrong, it wastes money and can actually harm your plants.
Why Mulch Matters in Jacksonville
Sandy Soil Challenges
Our sandy soil drains incredibly fast. Water your azaleas in the morning, and by afternoon the soil feels dry. Mulch acts as a protective layer, slowing evaporation and keeping moisture available to plant roots longer.
Sandy soil also lacks organic matter. It's basically inert particles that don't hold nutrients. As mulch breaks down, it enriches the soil with organic material, improving structure and nutrient retention over time.
Heat and Humidity
Summer temperatures regularly hit 90-95°F with brutal humidity. Exposed soil gets even hotter—surface temperatures can reach 120°F, cooking shallow roots.
A 2-4 inch layer of mulch insulates the soil, keeping root zones 10-15 degrees cooler. This matters for everything from camellias to hydrangeas.
Weed Suppression
Jacksonville's long growing season (March-October) means weeds grow relentlessly. Bare soil invites dollar weed, spurge, crabgrass, and countless other invaders.
Thick mulch blocks sunlight, preventing weed seed germination. You'll still get some weeds (seeds blow in, birds deposit them), but far fewer than in unmulched beds.
Storm Runoff and Erosion
Our summer afternoon thunderstorms dump 1-2 inches of rain in an hour. Unmulched beds lose topsoil to erosion. Mulch absorbs impact, slows water flow, and protects soil from washing away.
Types of Mulch for Jacksonville Gardens
Organic Mulches (Break Down Over Time)
Pine Bark Nuggets: Large chunks of pine bark, typically 1-3 inches in size. Common throughout Jacksonville.
Pros: Long-lasting (2-3 years), attractive reddish-brown color, readily available
Cons: Can float away during heavy storms, larger nuggets don't stay in place on slopes
Best for: Flat beds around foundation plantings, mature landscapes
Shredded Pine Bark: Finely shredded pine bark. Knits together better than nuggets.
Pros: Stays in place better, good for slopes, natural look
Cons: Breaks down faster (12-18 months), can mat when wet
Best for: Hillside plantings, beds with frequent replanting
Hardwood Mulch: Shredded or chipped hardwood (usually oak or mixed species), often dyed brown, red, or black.
Pros: Fine texture, rich color options, stays put
Cons: Breaks down quickly in Jacksonville's heat and humidity (6-12 months), dyes can leach onto driveways
Best for: Front yard beds where appearance is priority, annual refresh is acceptable
Cypress Mulch: Shredded bald cypress. Light-colored, fluffy texture.
Pros: Natural resistance to decay and insects, lighter weight
Cons: Controversial due to wetland harvesting practices, can blow away in wind
Best for: Areas where termite resistance matters (near wood structures)
Pine Straw: Dried pine needles, sold in bales.
Pros: Inexpensive, easy to apply, excellent for acid-loving plants (azaleas, camellias)
Cons: Blows away in wind, highly flammable, needs frequent replenishment
Best for: Large area coverage on a budget, under pine trees where needles naturally accumulate
Melaleuca Mulch: Made from invasive melaleuca trees. Shredded, fibrous texture.
Pros: Environmentally beneficial (uses invasive species), long-lasting, good moisture retention
Cons: Can be hard to find, more expensive
Best for: Eco-conscious homeowners, coastal plantings
Inorganic Mulches (Don't Break Down)
River Rock and Pebbles: Smooth stones in various sizes and colors.
Pros: Permanent, low maintenance, heat-tolerant
Cons: Doesn't add organic matter, hard to remove if you change design, gets hot in summer sun
Best for: Desert-style landscapes, around cacti and succulents, drainage areas
Lava Rock: Porous volcanic rock, typically red or black.
Pros: Lightweight despite appearance, good drainage, doesn't fade
Cons: Sharp edges can be uncomfortable, doesn't cool soil
Best for: Decorative accents, dry garden areas
Rubber Mulch: Recycled tire rubber, shredded or nuggets.
Pros: Long-lasting, doesn't blow away, available in colors
Cons: Doesn't enrich soil, can retain heat, not biodegradable, questionable chemicals
Best for: Playgrounds, high-traffic areas (not recommended for typical garden beds)
What I Recommend for Jacksonville
For most garden beds, shredded pine bark or pine bark nuggets are ideal. They're affordable, locally available, look natural, and break down at a reasonable rate (replenish annually or every other year).
For azaleas, camellias, and other acid-loving plants, pine straw works well and helps maintain acidic soil pH.
Avoid dyed hardwood mulch near light-colored driveways or patios—the dye can wash off during summer storms and stain surfaces.
How Much Mulch Do You Need?
Mulch is sold by cubic yard (27 cubic feet) or in bags (typically 2 cubic feet per bag).
Calculate Coverage
For 3 inches depth (standard recommendation):
- 1 cubic yard covers approximately 100 square feet
- 1 bag (2 cubic feet) covers approximately 8 square feet
To calculate your needs:
- Measure bed length and width in feet
- Multiply to get square footage (Length × Width = Sq Ft)
- Divide by 100 to get cubic yards needed for 3-inch depth
Example:
A bed that's 20 feet long × 5 feet wide = 100 square feet
100 ÷ 100 = 1 cubic yard needed
For multiple beds, calculate each separately and add totals.
Bulk vs. Bagged Mulch
Bulk Mulch (Delivered by Dump Truck):
- More economical for large jobs (5+ cubic yards)
- Available at landscape supply yards (San Jose Boulevard, Beach Boulevard)
- Requires a place to dump and store temporarily
Bagged Mulch:
- Convenient for small jobs (under 2 cubic yards)
- Available at hardware stores and garden centers
- More expensive per cubic yard, but easier to handle
For a typical Jacksonville yard with 3-4 beds totaling 300-400 square feet, you'll need about 3-4 cubic yards, which is 40-55 bags. Bulk delivery makes sense at that scale.
Tools and Materials
Tools:
- Wheelbarrow
- Pitchfork or mulch fork
- Garden rake
- Edging tool (for redefining bed edges)
- Work gloves
- Measuring tape
Materials:
- Mulch (calculated based on bed size)
- Landscape fabric (optional, controversial—more on this later)
- Pre-emergent weed barrier (granular, optional)
Step-by-Step Mulching Process
Step 1: Weed and Clean the Beds
Start with clean beds. Pull all weeds by hand, getting roots if possible. Rake out fallen leaves, old mulch debris, and dead plant material.
Jacksonville beds collect oak leaves, palm fronds, and random debris year-round. Cleaning before mulching prevents decomposing material from creating a soggy layer under fresh mulch.
If weeds are severe, consider spot-treating with herbicide 1-2 weeks before mulching. Let weeds die back completely before proceeding.
Step 2: Edge the Beds
Redefine bed edges using a half-moon edger or flat spade. Create a clean line between bed and turf.
This prevents St. Augustine grass from creeping into beds and makes the finished mulch job look crisp and professional.
In neighborhoods with HOA standards (Nocatee, Deerwood), neat edges are often required.
Step 3: Trim and Prune Plants
Trim back any overgrown shrubs or perennials that hang over bed edges. This makes mulch application easier and ensures mulch doesn't pile up against plant stems (which can cause rot).
Prune dead or damaged branches from shrubs. Do major structural pruning in late winter/early spring, but tidying up before mulching is fine year-round.
Step 4: Apply Pre-Emergent (Optional)
If you want extra weed protection, apply granular pre-emergent herbicide before mulching. Products like Preen or corn gluten meal create a barrier preventing weed seeds from germinating.
Water lightly after applying to activate the product, then proceed with mulching.
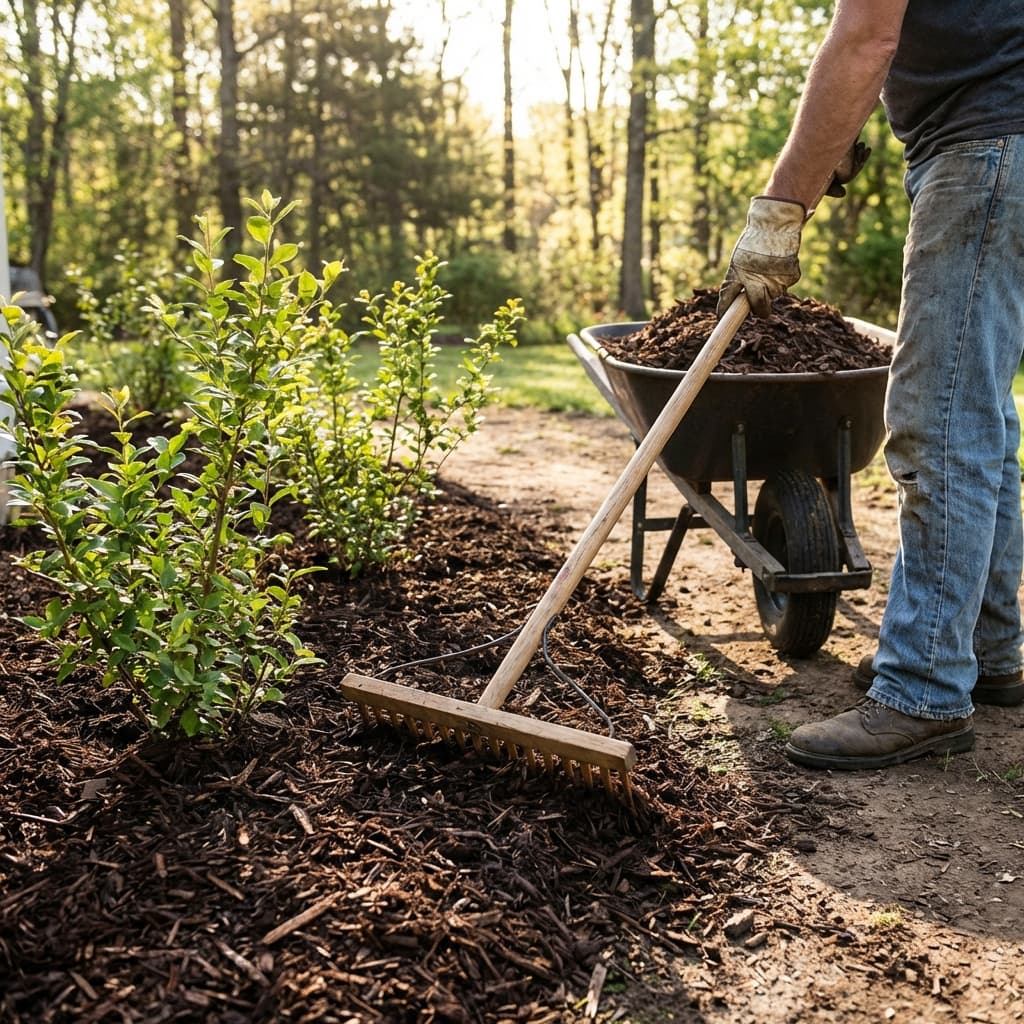
Step 5: Spread the Mulch
Start at the back of the bed and work forward. Dump small piles of mulch throughout the bed, then spread evenly with a rake or gloved hands.
Target depth: 2-4 inches
- 2-3 inches: Sufficient for weed suppression and moisture retention in established beds
- 3-4 inches: Better for new beds, areas with severe weed pressure, or during summer heat
Avoid "mulch volcanoes": Keep mulch 3-6 inches away from plant stems and tree trunks. Mulch piled against bark creates moist conditions that promote rot, fungal disease, and insect damage.
Picture a donut around each plant, not a volcano.
Step 6: Shape and Smooth
Use a rake to smooth the mulch surface, creating a consistent, even appearance. Pull mulch away from bed edges slightly to prevent spilling onto turf or walkways.
For a formal look, rake mulch in one direction. For a more natural appearance, leave slight irregularities.
Step 7: Water Lightly
After mulching, water the beds lightly. This settles the mulch, helps it knit together, and washes dust off plant foliage.
Don't soak the beds—a light misting is enough.
Step 8: Clean Up
Sweep or blow off any mulch that landed on driveways, sidewalks, or lawns. Fresh mulch looks great; mulch scattered across your driveway does not.
Check that bed edges are still clean and defined after spreading mulch. Touch up with an edger if needed.
Landscape Fabric: Yes or No?
This is a hot-button topic among landscapers. Landscape fabric (weed barrier) is a permeable synthetic fabric laid under mulch to block weeds.
Arguments Against Landscape Fabric (My Position)
It doesn't prevent weeds long-term.
Weed seeds blow in and germinate on top of the fabric, rooting into the mulch layer. After 2-3 years, you'll have weeds growing anyway.
It prevents mulch from enriching soil.
Organic mulch breaks down and adds nutrients to soil—that's one of its main benefits. Fabric blocks this process.
It's a pain when you want to plant something new.
Adding plants requires cutting through fabric, and over time the fabric becomes shredded and ineffective.
It can create drainage problems.
While labeled "permeable," fabric can clog with fine particles in sandy soil, causing water to sheet off rather than soaking in.
Arguments For Landscape Fabric
It reduces weeds initially.
For the first 1-2 years, fabric does reduce weed pressure.
It prevents mulch from mixing with soil.
In very sandy areas, mulch can gradually work its way into the soil. Fabric keeps layers separate.
My Recommendation
Skip landscape fabric for most Jacksonville garden beds. Instead, use thick mulch (3-4 inches) and replenish annually. This gives you better weed control, soil enrichment, and flexibility.
If you insist on fabric, use it only for permanent plantings (mature shrubs you won't move) and expect to replace it every 5-7 years.
Maintaining Mulched Beds
Mulching isn't "one and done." Plan for ongoing maintenance.
Annual Replenishment
Mulch breaks down over time, compacted by rain and decomposed by microbes. Plan to add 1-2 inches of fresh mulch annually.
In Jacksonville's heat and humidity, organic mulch breaks down faster than cooler climates. Budget for yearly refresh, typically in spring (March-April) or fall (October-November).
You don't need to remove old mulch—just top it off. Old mulch breaks down into soil, enriching your beds.
Weed Patrol
Even mulched beds get weeds. Walk through your beds weekly and pull any weeds you spot. They're easier to remove when small.
If weeds become severe, apply pre-emergent herbicide in late winter (February) before weed seeds germinate.
Fluffing and Raking
Over time, mulch compacts and forms a dense mat. Every few months, rake through beds to fluff and aerate the mulch. This improves air and water penetration.
Storm Cleanup
After heavy storms (common June-September), check beds for washout or displacement. Rake mulch back into place and add more if needed.
During hurricanes, mulch can blow away entirely. Keep extra bags on hand for post-storm repairs.
Monitor Plant Health
Check that mulch hasn't piled up against plant stems. As you add fresh mulch each year, it's easy to accidentally create volcanoes.
Pull mulch back from stems periodically to maintain that 3-6 inch gap.
Jacksonville-Specific Considerations
Summer Heat
Fresh dark mulch absorbs heat in July and August. If you're mulching in peak summer, consider lighter-colored options (pine straw, cypress) or water beds more frequently after mulching.
Hurricane Season
Mulching in late spring (April-May) gives beds summer protection but risks hurricane displacement. Mulching in fall (October-November) avoids hurricane season but requires waiting through summer.
I prefer spring mulching for moisture and heat benefits, with post-storm touch-ups as needed.
Fire Ants
Sandy soil plus organic mulch equals fire ant paradise. They love nesting in mulch beds.
If you see mounds, treat immediately with ant bait. Avoid liquid pesticides that can harm beneficial insects and plants.
Termites
There's a myth that mulch attracts termites. Reality: termites are everywhere in Florida, mulch or not.
Cypress and melaleuca mulch have natural termite resistance. For standard pine bark, just keep mulch away from wood siding and foundations (6-inch gap minimum).
Acidic vs. Alkaline Mulch
Pine products (bark, straw) are slightly acidic, which is perfect for azaleas, camellias, hydrangeas, and gardenias—all common Jacksonville plants.
If you're growing plants that prefer neutral or alkaline soil (vegetables, herbs), consider hardwood mulch instead.
Mulching Different Bed Types
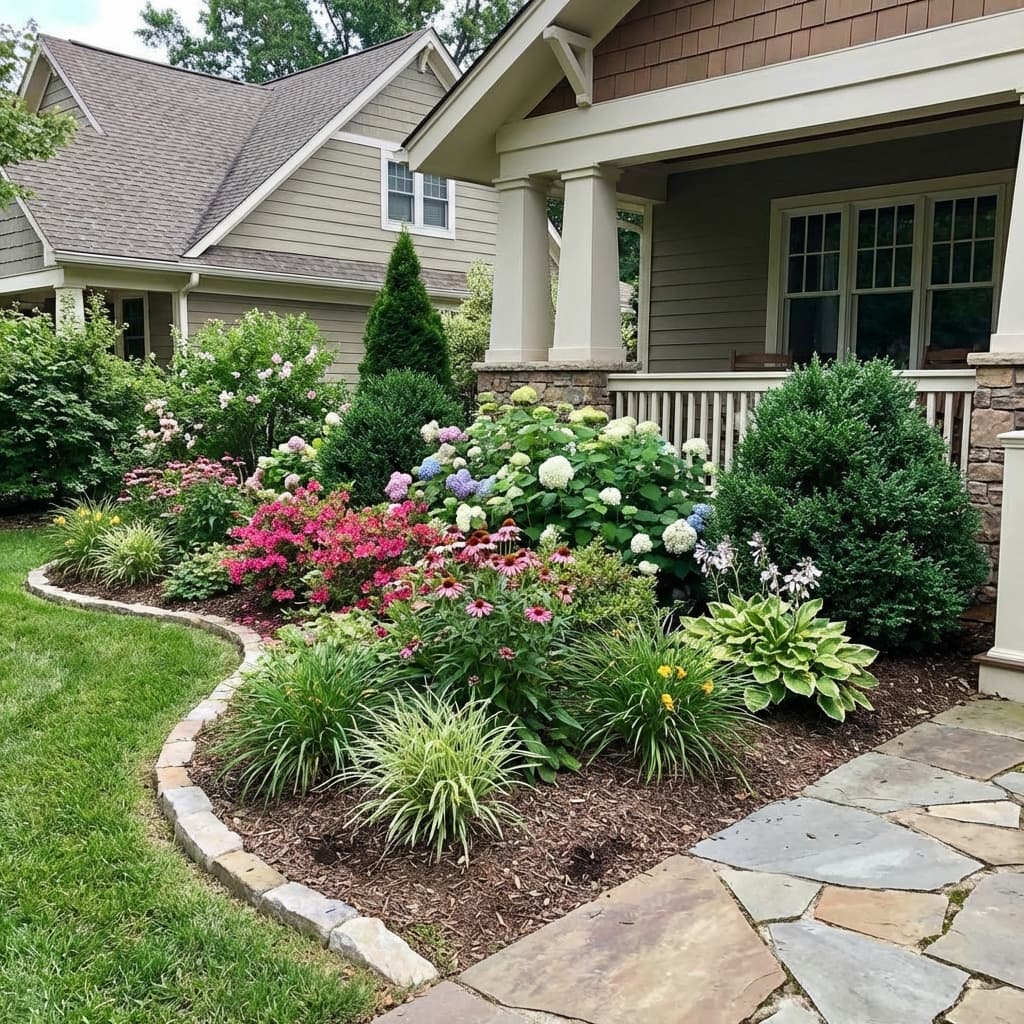
Foundation Plantings
Beds along house foundations benefit from 3-4 inches of mulch. Keep mulch at least 6 inches away from siding or brick to prevent moisture damage.
Use attractive mulch (pine bark nuggets, hardwood) for high-visibility areas.
Slope and Hill Beds
Shredded pine bark or pine straw works best on slopes—it knits together and resists erosion better than nuggets.
Apply slightly thicker (4 inches) to prevent washout during storms.
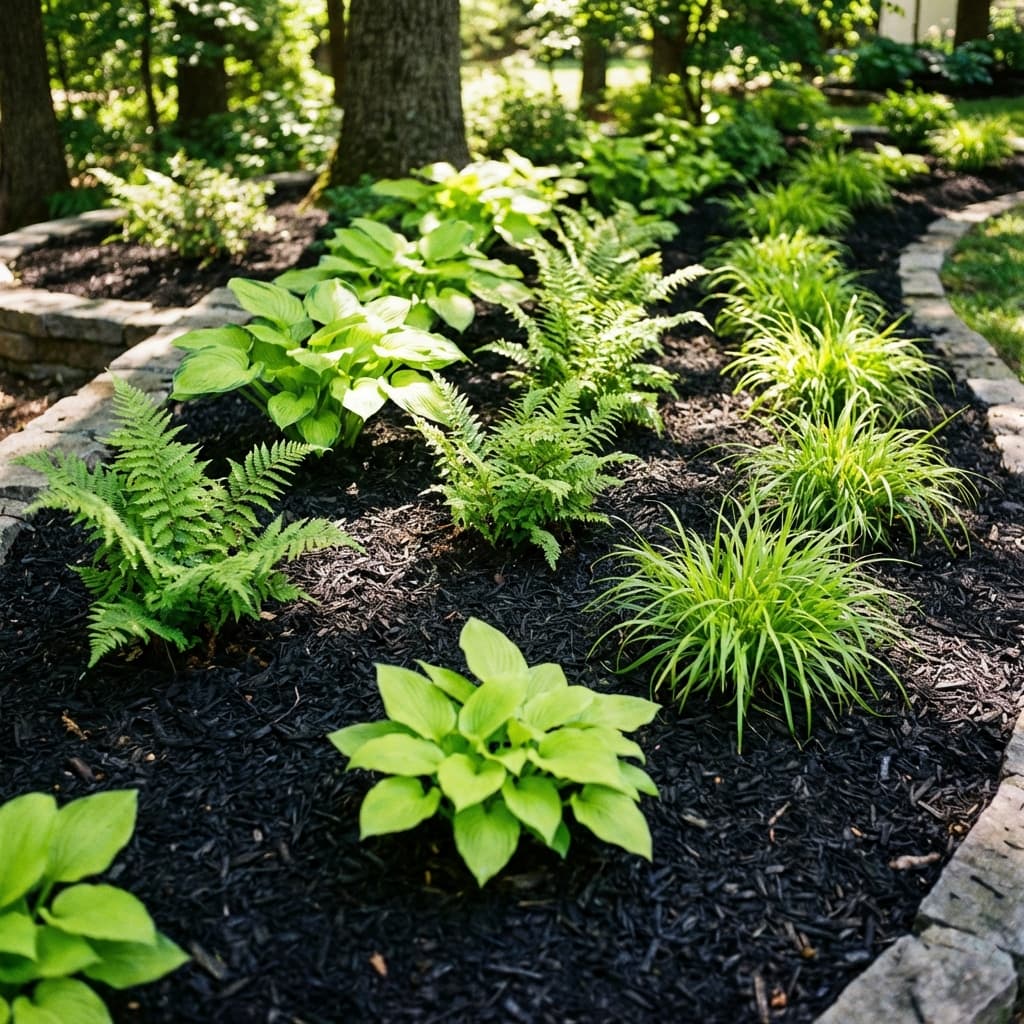
Shade Garden Beds
Under oaks, magnolias, or other large trees, beds are naturally shaded. Use pine straw or shredded bark, which work well in low-light conditions.
These beds stay moister longer, so 2-3 inches of mulch is sufficient.
Vegetable and Herb Gardens
Straw (not hay—hay has seeds) or shredded leaves work well for edible gardens. They break down quickly, adding organic matter before you replant.
Avoid dyed mulches near vegetables—stick to natural products.
Native Plant and Wildflower Beds
Pine straw or minimal mulch works best. Many native plants prefer less mulch than ornamental beds.
Let some leaf litter remain—it's natural and beneficial for native ecosystems.
Common Mulching Mistakes
Mulch Volcanoes: Piling mulch against trunks and stems is the #1 mistake. This kills plants over time by promoting rot and disease.
Too Little Mulch: A thin 1-inch layer doesn't suppress weeds or retain moisture effectively. Go for 2-4 inches.
Too Much Mulch: More than 4-6 inches can suffocate plant roots and prevent water/oxygen penetration.
Mulching Too Close to Plants: Leave breathing room around plant crowns. Mulch should never touch plant tissue.
Not Refreshing Annually: Mulch breaks down. Add fresh mulch yearly or beds will thin out, losing effectiveness.
Using Fresh Wood Chips: Freshly chipped wood robs nitrogen from soil as it decomposes. Use aged or composted mulch for garden beds.
When to Call a Professional
Mulching is very DIY-friendly, but consider hiring help if:
- You need 10+ cubic yards for a large property
- Your beds have drainage or grading issues that need correction first
- You're physically unable to move and spread heavy mulch
- You want landscape design advice on bed layout and plant selection
Professional mulch installation is affordable and includes bed prep, edging, and cleanup.
Final Thoughts
Mulching garden beds in Jacksonville is one of the best investments you can make in your landscape. It's not glamorous work—spreading several cubic yards of mulch is sweaty, physical labor in our heat and humidity.
But the payoff is worth it. Your plants will be healthier, water bills will drop, weeding time will decrease, and your yard will look polished and cared-for.
Fresh mulch transforms a landscape. Drive through Riverside or Avondale in early spring and you'll see the difference between yards that mulch regularly and those that don't.
Pick the right mulch for your plants and budget, apply it correctly (no volcanoes!), and refresh it annually. Your garden beds—and your neighbors' compliments—will thank you.
Need Professional Sod Installation?
Jax Sod provides sod installation, sod replacement, and new lawn installation across Jacksonville and Northeast Florida. Free quotes!
Related Articles
How to Build a Raised Garden Bed in Jacksonville, FL
Complete guide to building raised garden beds in Northeast Florida. Learn the best materials, soil mixes, and what to grow in Jacksonville's Zone 9a/9b climate.
Mulch Delivery Cost Jacksonville FL: What to Expect and How to Save
Understanding mulch delivery costs in Jacksonville, FL. Learn about pricing factors, bulk vs bagged options, and tips for getting the best value on your landscaping mulch.
Types of Mulch for Jacksonville Landscapes — Which One Should You Use?
Expert guide to choosing the best mulch for Northeast Florida gardens. Compare pine bark, pine straw, cypress, and other mulch types for Jacksonville's climate.
Get Started
Ready for a New Lawn?
Get a free, no-obligation quote from Jax Sod for sod installation, sod replacement, or a new lawn in the Jacksonville area.
(904) 901-1457